Aside from my article where I discover the Kodak Instamatic 500, here are some side notes about its usage and repair.
Indeed, information for disassembly or adjustment of the Instamatic 500 is very scarce, and I thought it might help to write about some things I found useful.
Sensibility setting
The Instamatic 500 camera has no on-body sensibility setting. There is, however, a mechanical sensor that recognize a shape on the top of film cartridges corresponding to the film sensibility.
I did not find any documentation about this sensor position and you’ll have to trust your old cartridges for film sensibility indication.
Light seals
Note that, as for any 126 film camera, the Instamatic 500 does not require any particular light seal attention: there are none. The film cartridge itself ensures light-tightness. But beware if using 35mm film in a reused cartridge: the back side window will let light through so don’t forget backing paper.
Plastic face fastening
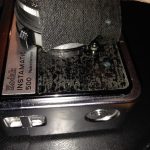
The plastic facade of the Instamatic 500 tends to loosen with time: it is because the tightening screws are made of brass and are subject to corrosion.
These screws are found below the leatherette, the latter being very easy to unglue, and even more sometimes still correctly glues itself back in place. Just use a fine cutter blade to lift one corner, then gently pull up the leatherette pieces. The screws below are made of blackened brass, you can clean them and screw them back in place without applying too much force.
I did not push further but logic would have that removing all these screws, then the plastic faceplates, would get access to the cameras guts.


Lightmeter adjustment
If you strip your Instamatic 500, you will also find below the viewfinder a small metal cover hiding what seems to be the lightmeter adjustment mechanism. I did not mess with this myself, my lightmeter was just fine, and I am not sure how this works but in case you need to adjust yours, you’ll probably want to start looking this way.
Easily advancing 135 film
The main issue when using standard 135 film in an Instamatic camera is about correctly advancing the film. In 126 film, there is a hole that helps the camera to discover the correct position between each frames. With the Instamatic 500, there is a trick to advance the film just to the right amount, and without the need to shoot intermediate black pictures.
With 35mm perforated film, after a shot, you can then maintain the shutter release while in the same time maneuvering the cocking lever: the latter will continue till the end of its course without stopping. Release the shutter release and, if needed, apply a final short stroke to the lever: you’ll be ready to shoot the next frame.
This is poor information, but I find it being a whole lot more that I have myself found online. If you have more precise questions, don’t be afraid to ask in the comments, I’ll sure take some time to have a closer look at my own cameras.
Hello, thanks for the website! I have this camera (Instamatic 500) but the viewfinder is a little dusty. Do you know how to clean it? A little wary of disassembling it because I am sure its pretty complicated!