A long year of lockdown will finally have been enough to update 166 cameras’ and 44 lenses’ pages, translate all those to get a bilingual website, go through image modification for a bunch of the oldest pictures…
Still here? Here is a bit more about what’s there:
A vintage cameras collection, obviously, but not only. The pages contain technical informations for each camera, and links to other references on my site or Sylvain Halgand’s Collection-Appareils.fr.
A vintage lenses collection, along the compatible cameras.
A bibliography, mostly in French, that has been of help in identifying and learning the specificities of allthe listed items.
An advanced browsing experience, allowing to go from a camera to its maker, from the maker to its lenses, from the lenses to the compatible cameras, etc., brought to you by the magic powers of Omeka S.
Like all collections, this catalog will constantly evolve. I already have 4 new (fun) items waiting to be introduced.
This is also an amateur’s work, so use it with caution. Please feel free to point out the errors you’ll encounter: comment here or contact me through my social accounts.
In the available selection of vintage rangefinder cameras equipped with fixed lenses, the premium lineup is mainly characterized by large apertures offerings. Most renowned are the obvious Canon’s Canonet, Minolta’s Hi-Matic or Yashica’s Electro 35 ranges, among which some models open as wide as f/1.7.
While today a galloping inflation hits these sought after jewels (Canonet QL17 now usually costs more than €150), alternatives do exist, one of them being the less famous Konica Auto S2.
Introduction
The Konica Auto S2 is a compact rangefinder camera, made in Japan and sold, in France, from 1966 until 1968. Compact, it quite is when it comes to the size, although a bit above average. But it is not lightweight at all: with 760g, it joyfully plays in the SLR league.
Size and weight do not make a sturdy camera. The front element containing the optics is… wobbly, which seems to be an aging condition of some, if not all, the items in the S2 series.
So what did Konica put into its heavy and rickety camera that make it a little bit special?
A premium range tank
First, the camera’s size gives it a good and firm grip with enough space for both hands on both sides of the lens barrel. Focusing is easily done with the tip of the left hand finger. Held like this, its weight is quickly forgotten.
The lens barrel sports the Hexanon 46mm lens, opening wide, really wide, up to f/1.8. This aperture was more common in SLR kits at the time the Auto S2 was sold, and it was meant to be the top premium offering for fixed lens rangefinder cameras. The Hexanon formula piles up 6 individual lenses in 4 groups and has very good reputation.
The Hexanon 46mm lens opens wide, up to f/1.8
The shutter is a Copal SVA that performs up to 1/500th of a second. Slow speeds also rise up to 1 second. Exposure is set either using the shutter speed priority mode relying on a CdS type cell fueled by a PX625 battery, or by choosing both aperture and speed manually. The light meter stays active in both cases.
The S2’s viewfinder is really bright. Even in dimmed light situations, it is possible to distinguish the rangefinder patch. Another clue of the premium range positioning: parallax is automatically corrected by a moving frame in the finder dependent on the selected focusing distance. Finally, even if the main display of the light meter takes place on the top of the camera, the same reading is possible in the viewfinder, reflected by internal mirrors above the picture frame. A needle moves between minimum and maximum aperture marks when the photograph selects a shutter speed. The only action left is to take the picture!
When it comes to flaws, the Konica Auto S2 has some. First of all, the camera is not easy to use if you wear glasses like me. You’ll have to get close to the viewfinder to read all the provided informations. What’s more, when using the manual exposure mode, fat fingers will have issues selecting an aperture without changing focusing distance at the same time.
Finally, an additional reading of the selected speed would have been nice to have. It is easy to select a slow speed without really knowing, and then end up with blurry pictures!
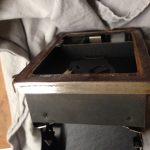
On the operating table
I did not use my Konica Auto S2 on its first day home. When it arrived, the patient was seriously sick: a hella lot of dust everywhere (and still now…), no rangefinder patch in the viewfinder, aperture blades desperately stuck together… Operation was unavoidable.
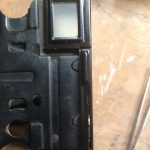
Top cover disassembly is really simple: no screws, the cover is only held by the advance lever, the base of the shutter button, and the rewind crank, all easily unscrewed by hand (or using a friction tool).
Top cover disassembly is really simple: no screws.
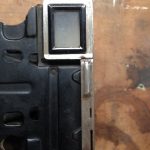
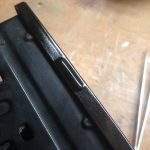
The rangefinder mirror was loose in the viewfinder chamber. This is a surface coated mirror. It is therefore possible to fix it using UV glue, quick and reliable strategy. Adjustment is then made, top cover on, using the holes under the accessory shoe giving access to the setting screws.
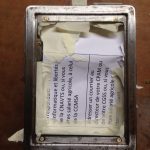
Front lens disassembly, also quite simple, lets you properly clean old grease off the lenses and shutter mechanism. Accessing from the inside is doable but a lot more tight, yet it is mandatory if you need to clean the rear lens element. In the S2, there is no need to disconnect the light meter circuit in order to access all parts, as long as wires are carefully manipulated.
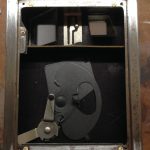
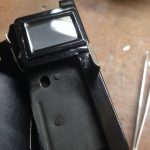
Surprise! The lightmeter is a Sekonic module!
In order to unstick the aperture blades, a few drops of naphta on the blades are sufficient. Activate the mechanism a couple of times to spread the product and check that everything runs smoothly. The Copal SVA shutter seems robust, all speeds sounded just right in spite of its age.
Surprise! Under the top cover, the light meter shows its brand, and not any brand: this is a Sekonic module! It originally ran using a PX625 mercury battery. If you follow this blog, you know how to replace it: simply use a PR77 battery with a shim that fits the battery compartment. Note also that a regular 625A alkaline gives sufficiently correct readings.
Patient finally out of surgery, let’s fit a roll of Ilford HP5 inside the camera and screw a yellow or orange 55mm filter and shoot!
Using the Konica Auto S2
Handling the Auto S2 wipes away its heavy weight. The very bright viewfinder eases focusing and framing. Firing the shutter is a quiet operation, but advancing the film is not! So much for discretion.
The light meter cell is placed just above the lens, and thus enables the use of colored filters. The wide aperture makes interior pictures quite easy to manage. And finally, the Hexanon lens produces really nice images!
Do not hesitate to ask in the comments if you have questions about the Konica Auto S2, and please share your pictures shot using this camera with me on Instagram. Have fun!
More info
If you need to service your own Auto S2: here is a camera specific repair how-to.
Also check out the usual camera page on Sylvain Halgand’s Collection-Appareils website.
This article is a follow-up of an older one 🇫🇷, where I wondered myself what software I should use to manage my cameras & lenses collection. Back then, I explained I chose Omeka, an open-source solution developed by the Center for History and New Media, George Mason University, and broadly used by cultural institutions across the world.
Really, that was well meant and I totally wanted to catalog all my cameras but, actually… I never saw this through to the end. I stumbled on the lack of dynamic linking between items and dynamic list of properties.
Add to this my own lack of motivation, procrastination and the song of all those sirens/cameras calling on my shelves, and you’ll understand why I did not pushed further.
But everything changed at the end of 2017, when Omeka S was released…
There are some photographic experiences that have become so uncommon that they always call to be shared. The use of a camera like the Kodak Instamatic 500 is one of them.
No unusual adventure led me to this camera discovery. It already has a solid reputation (I also mentioned it in one of my first articles, in french but still accurate, about the 5 best vintage cameras to start your collection🇫🇷). My camera has been generously offered by a visitor on collection-appareils.fr forums.
Introduction
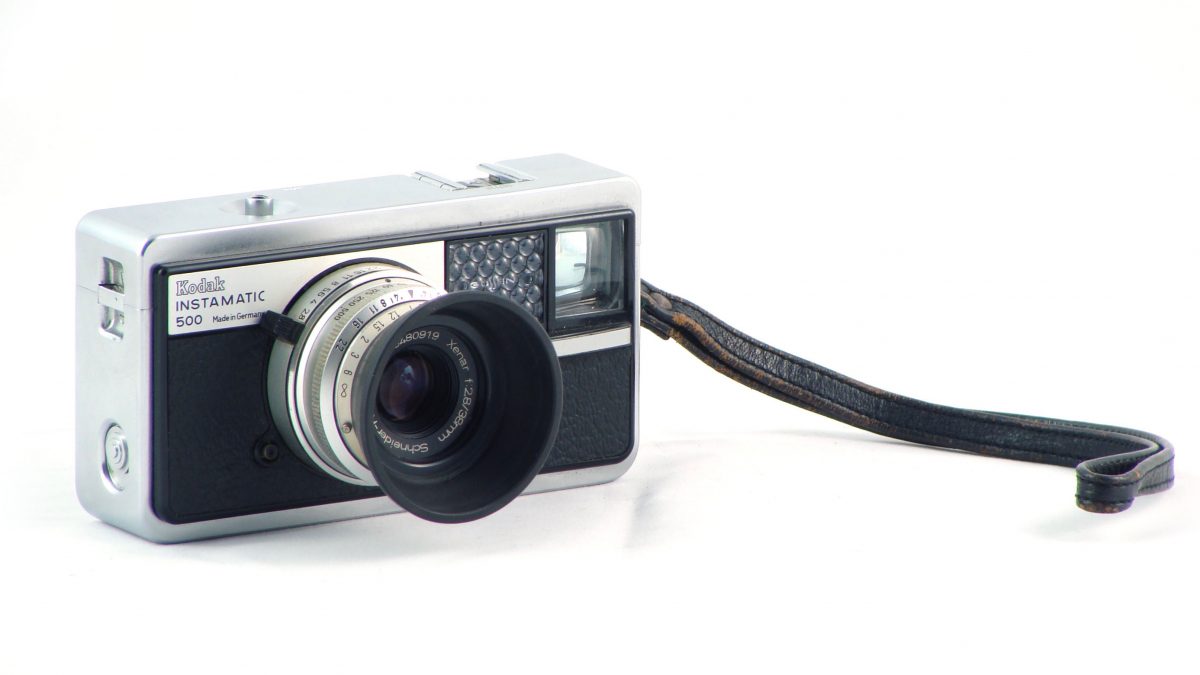
The Kodak Instamatic 500 is a camera that inherited the compactness of the Instamatic line: 12.7cm width and 7cm high, and thickness from 5cm to 6cm with the lens in or out of the body.
Top of the Instamatic range, made from 1963 (year my specimen was made if I can trust the serial number) to 1966, it is mounted with a bright Schneider Kreuznach Xenar 38mm f/2.8 lens. It is a Tessar-like formula using 4 lenses in 3 groups that, as we’ll see later, give very nice results with color film.
Front
Front
Back
Instamatic Rolls Royce : number 500, with strap and sun shield
The shutter is also very capable: it goes as fast as 1/500th of a sec. There is no slow speed below 1/30th of a sec, but it provides Bulb speed.
Focusing is manual and gets as close as 70cm. Unfortunately, no rangefinder is provided, you’ll have to guess the distances.
Luckily, the addition of a lightmeter, coupled to the shutter speeds and aperture selection, makes up for the lack of focusing assistance. And not any lightmeter: this is a Gossen cell, proudly wearing its name on the front of the camera. But beware: you won’t find any sensibility selection on the Instamatic 500 body.
The viewfinder is very bright, and displays parallax correction marks, as well as the lightmeter needle – visible as soon as you get your eye close enough. Nice bonus: the lightmeter indications provide +1 an -1 exposure compensation markings!
The Instamatic 500 viewfinder gives simple and clear lines and marks for closer shots parallax.
The Instamatic 500 lightmeter, visible below the finder, has exposure compensation marks – useful!
The shutter button is threaded to receive a cable release, and finally a push button below the camera’s foot unlocks the front lens that can be pushed in for transport. When in, a simple push on the button and the lens pops out, ready to shoot!
Handling is also eased by the shape of the camera: although compact, it provides large surfaces where to put your fingers to safely hold it tight. A plastic barrier keeps the photographer from hiding the cell or the viewfinder. Too bad though, that there is no reminder of the selected speed or aperture, space is not an issue in the viewfinder.
Finally, the beast has a weight: 700g, far from the other Instamatic cheap plastic cousins.
The 126 problem
All these dream specs do hide an issue: the Instamatic 500 uses 126 type film cartridges that are not manufactured any more.
To those unfamiliar with this format, they are small plastic boxes that you only have to put inside the camera, no manipulation needed. Alas they were ousted by the more common 135 format we know. Today, possibilities are limited.
The “Fakmatic” enables to load standard perforated 35mm film in a reusable cartridge, but you have to be good with your hands and you need to handle it in total darkness (either in a dark room or a film changing bag). Moreover, you’ll have to deal with the film sprocket holes that will populate the top of your pictures. Finally, the Instamatic won’t let you select film sensibility, so I’m not certain how it will perform with this cartridge.
There is still hope that 126 film will eventually be produced again, via the rebirth of Ferrania, or via a french project named Project126. But nothing immediate.
So, my camera sat on a shelf for some time. But one day my Twitter feed slipped a proposal.
…and I did not hesitate! Expired in October 2004, this cartridge had luckily kept all its quality and let me use my Instamatic 500 at its full potential.
And the results are up to my expectations! I used an accessory rangefinder to use the lens to its widest aperture, and the image quality is excellent.
Rennes – Solaris 200 126 film
Rennes – Solaris 200 126 film
Rennes – Solaris 200 126 film
Rennes – Solaris 200 126 film
Rennes – Solaris 200 126 film
Rennes – Solaris 200 126 film
Rennes – Solaris 200 126 film
Rennes – Solaris 200 126 film
Rennes – Solaris 200 126 film
Rennes – Solaris 200 126 film
Rennes – Solaris 200 126 film
Rennes – Solaris 200 126 film
Rennes – Solaris 200 126 film
Paris – Solaris 200 126 film
Do not hesitate to ask in the comments if you have questions about the Kodak Instamatic 500, and please share your pictures shot using this camera with me on Instagram. Have fun !
Indeed, information for disassembly or adjustment of the Instamatic 500 is very scarce, and I thought it might help to write about some things I found useful.
Sensibility setting
The Instamatic 500 camera has no on-body sensibility setting. There is, however, a mechanical sensor that recognize a shape on the top of film cartridges corresponding to the film sensibility.
I did not find any documentation about this sensor position and you’ll have to trust your old cartridges for film sensibility indication.
Light seals
Note that, as for any 126 film camera, the Instamatic 500 does not require any particular light seal attention: there are none. The film cartridge itself ensures light-tightness. But beware if using 35mm film in a reused cartridge: the back side window will let light through so don’t forget backing paper.
Plastic face fastening
The plastic facade of the Instamatic 500 tends to loosen with time: it is because the tightening screws are made of brass and are subject to corrosion.
These screws are found below the leatherette, the latter being very easy to unglue, and even more sometimes still correctly glues itself back in place. Just use a fine cutter blade to lift one corner, then gently pull up the leatherette pieces. The screws below are made of blackened brass, you can clean them and screw them back in place without applying too much force.
I did not push further but logic would have that removing all these screws, then the plastic faceplates, would get access to the cameras guts.
Instamatic 500 – Screws below the leatherette
Instamatic 500 – Lghtmeter adjustment cover
Instamatic 500 – This may be the lightmeter adjustment mechanism (?)
Lightmeter adjustment
If you strip your Instamatic 500, you will also find below the viewfinder a small metal cover hiding what seems to be the lightmeter adjustment mechanism. I did not mess with this myself, my lightmeter was just fine, and I am not sure how this works but in case you need to adjust yours, you’ll probably want to start looking this way.
Easily advancing 135 film
The main issue when using standard 135 film in an Instamatic camera is about correctly advancing the film. In 126 film, there is a hole that helps the camera to discover the correct position between each frames. With the Instamatic 500, there is a trick to advance the film just to the right amount, and without the need to shoot intermediate black pictures.
With 35mm perforated film, after a shot, you can then maintain the shutter release while in the same time maneuvering the cocking lever: the latter will continue till the end of its course without stopping. Release the shutter release and, if needed, apply a final short stroke to the lever: you’ll be ready to shoot the next frame.
This is poor information, but I find it being a whole lot more that I have myself found online. If you have more precise questions, don’t be afraid to ask in the comments, I’ll sure take some time to have a closer look at my own cameras.
Most discoveries happen more by means of luck than because of intuition. We also sometimes owe them to some will to wander out of established trails. It was in Samois-sur-Seine, a nearby village, that I pushed the walk a couple of streets further than the usual annual car boot sale, arms full of Django Reinhard vinyl records, up to a discreet porch where a humble man was managing his isolated stand.
Other than a funny Coronet Twelve whose rounded shape would enlighten the day of many a camera collector, I sensed that the cardboard box was still a bit too much taped to the floor and might contain more. It did indeed contain a SLR case, nicely crafted by the way, with its accessory pouch. I unclipped the case button and… Lucky draw!
The striking detail: a massive chromed four pointed star
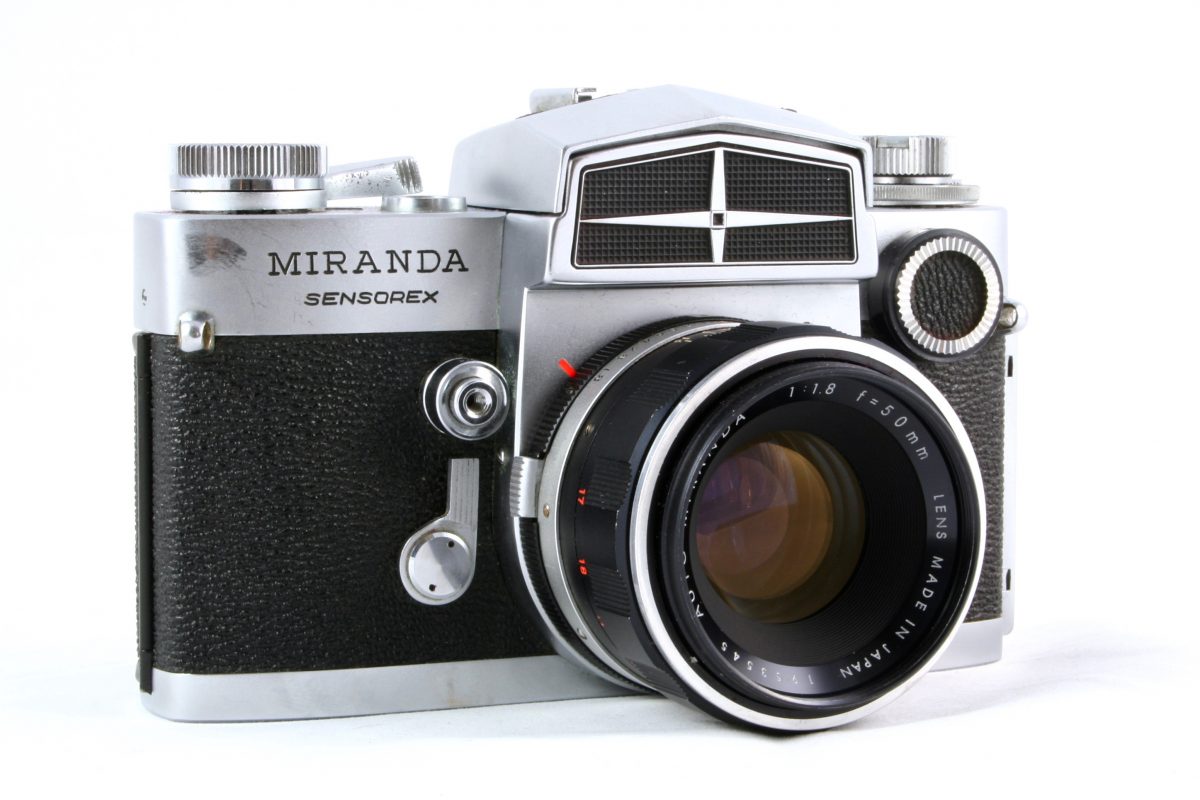
I already had the chance to meet this particular camera in antique 60s magazines. No chance to miss it, because the Japanese designers of the Miranda Camera Company added the detail that makes their camera memorable: a massive four-pointed star decorates the camera prism. Difficult not to compare it to some vintage car radiator grill. Let me introduce the Miranda Sensorex.
Miranda Sensorex – Front view
Miranda Sensorex – Front view
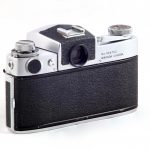
Miranda Sensorex – Rear view
Miranda Sensorex – Rear view
Miranda Sensorex – Front view
Miranda Sensorex – Auto Miranda 50mm f/1.8
Introduction
Built by the Miranda Camera Co. starting in 1967, the Sensorex is a really heavy 35mm SLR camera with interchangeable lens system. Its weight seems today inconceivable: 758g… body only! With the standard lens, it is rather 978g! The camera offers a good grip with lots of surface to lay your finger and firmly sustain the body weight. Nevertheless, beware of stiff muscles when you bring it, and its kilogram, on a full day walk.
The top cover is strangely simple. It is missing something. You can find the speed selection wheel. They go from 1 to 1/1000th of a second, pretty efficient in its time. It also provides a film sensibility selector, from 25 to 1600 ASA. Below the wheel, the film advance lever lets you cock the cloth shutter and get to the next frame in a quite short stroke. Other than these, you can find a cocking indicator, and the frame counter.
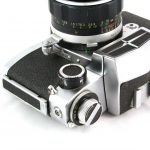
So, where is the shutter release? It is cunningly placed on the front, next to the lens, right above the self-timer lever, just like Zeiss Ikon/Pentacon was already doing on its Contax range. You use you middle finger to release the shutter while both your thumb and index finger firmly grip the top cover. This handling is natural and efficient.
Where is the shutter release? It is cunningly placed on the front. This handling is natural and efficient.
Left hand side is more crowded. The simple rewind lever tops the internal cell switch. The battery compartment is located on the rear of the cover, easily accessible above the back door. The battery used is a PX625 mercury, which you can replace with alkaline. I only shot black and white in this camera so pay attention to exposure errors with more sensible emulsions.
Miranda Sensorex – The maximum aperture selection knob, and the lever which transmits the aperture to the exposure meter.
Miranda Sensorex – Stripes on the mirror show where the exposure metering is done.
Still to the left, on the front, a manual selector lets you choose the widest aperture of the mounted lens, from f/1.4 to f/8. It then neutralises widest aperture in the TTL exposure measurements. Luxury, because this functionality only appeared 4 years earlier. Still better, the exposure is weighted from the lower part of the image, as per the markings on the mirror.
Sturdiness and quality
I have heard some concerns about the reliability of the Miranda cameras, and the quality of their optics. Forget these concerns, for they do not apply to the Sensorex.
The overall assembly shows production mastery. The buttons and levers do not suffer from any slack. Each manipulation sometimes needs one to apply a bit of force, but always stays formidably precise. The felted seals survived 50 years of storage and the camera does not let any interfering light in.
I have heard some concerns about the reliability of the Miranda cameras. Forget these concerns.
This set of observations and its massive look make this camera transpire sturdiness and precision. Only the lens that went with my specimen had spread a bit of grease on one optic. Not a problem since the lens is very well made, easy to dismantle, clean, reassemble and adjust.
In summary, the Sensorex had in its time all the equipments of manual SLR cameras that will still exist decades later. As an analogy, the Praktica MTL3 will be born 10 years later with the same range of functionality, only a couple of hundred grams lighter.
However, the Miranda Sensorex isn’t only a very good SLR for its time. It still had some tricks up its sleeve. What are its specifics that make it a unique object?
Ingenuity
The Japanese engineers of the Miranda Co. did not only create a very good SLR, they created a comprehensive modular system.
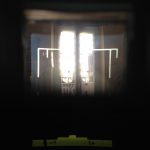
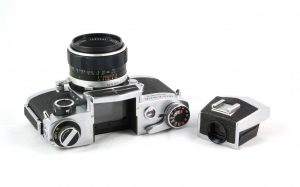
Starting with the interchangeable prism. A simple push-button loosens the whole top block that slides to the rear. Below the starred face there is only the ground glass left, with its multi-microprism focusing surface.
Miranda Sensorex – The standard prism removed
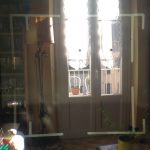
The standard prism enables eye-level focusing. Very bright, it only provides information about the exposure. With the Miranda Auto 50mm f/1.8 lens, the magnification factor of 0.92 lets you compose with both eyes open if you wish. But there exist situations in which an alternative viewfinder system may be of help. So Miranda also offered two other optional prisms.
With the standard lens, the magnification factor of 0.92 lets you compose with both eyes open.
The first optional prism is a waist-level viewfinder, still commonplace when the camera appeared. Waist-level focusing is useful when it is difficult or impossible to get the eye at camera level. It also enables sometimes more discreet shooting situations.
The second optional prism offered two magnification levels: the image center could be magnified 15 times to obtain critical focus. Alternatively, the whole picture could be magnified 5 times. This prism proved very useful especially for macrophotography or microphotography (attached to a microscope).
More surprising is the lens mount. On the Sensorex, it is double! The outside mount is a specific Miranda bayonet. On the inside, the mount contains a 44mm thread. Its purpose was to enable backwards compatibility with the older Miranda lens, a clever idea to create customer loyalty.
The Miranda mount: a twice clever idea!
But the most astonishing is yet to come. The camera has been very carefully designed, the distance between the mount and the film plane has been reduced to the minimum, the widest mount diameter has been chosen. All of this in order to be technically able to provide the widest range of adapters for all kind of lenses from the 60s: M42 (42mm threaded mount like the Tair-11A), Exakta, Topcon, Leica, Canon, Contax, Nikon lenses! Using the corresponding Miranda adapter (the user manual lists seven of them), ability to focus to infinity is preserved without any additional optic. It’s like living a dream!
In the field
So the Sensorex is beautiful, although a bit heavy, it is well equipped and full of promises when it comes to adaptability. But does it perform in the field? Here it is mounted with the standard Auto Miranda 50mm f/1.8 lens. How does it perform?
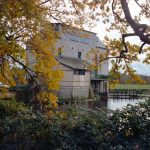
Great. Although you can see a bit of vignetting to large apertures, the Miranda lens is very sharp even in the angles, as soon as it is closed below f/2.0. Largest apertures provide with a very soft bokeh that tends to whirl a bit (like in the waiter picture).
I went for a walk with the camera loaded with an Ilford FP4 roll, I earned a proper shoulder massage and those wonderful results.
Avon – Ilford FP4
Avon – Ilford FP4
Paris – Ilford FP4
Samoreau – Ilford FP4
Fontainebleau – Ilford FP4
Samoreau – Ilford FP4
Fontainebleau – Ilford FP4
Paris – Ilford FP4
Paris – Ilford FP4
Samoreau – Ilford FP4
Vulaines sur Seine – Ilford FP4
Paris – Ilford FP4
Paris – Ilford FP4
Do not hesitate to ask in the comments if you have questions about the Miranda Sensorex, and please share your pictures shot using this camera with me on Instagram. Have fun !
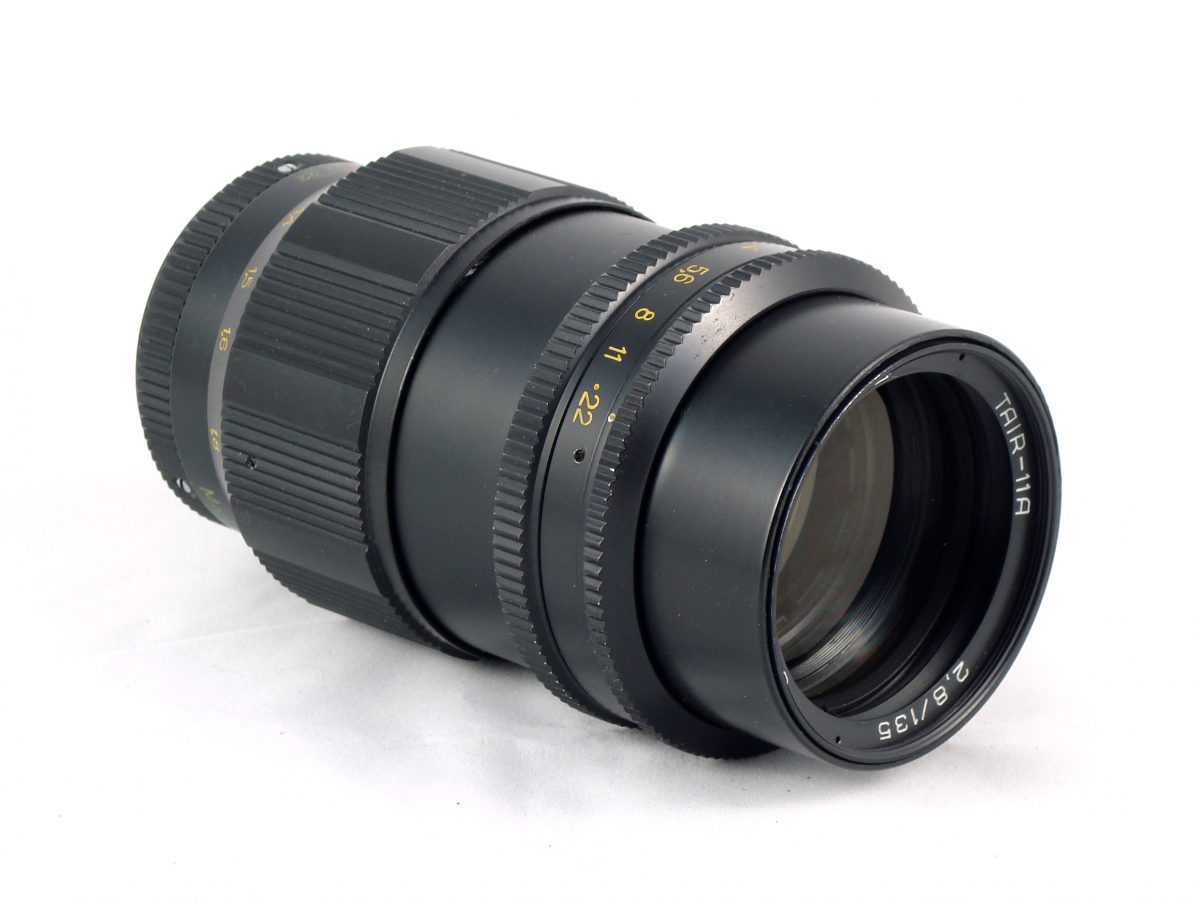
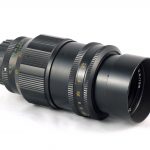
It’s an occasion that does not occur every day, even if it is not the most rare item in photography: I’ve had the chance to hold and use the time of a sunny day this really nice lens, a Tair-11A 135mm f/2.8 from KMZ.
Tair-11A with its included lens hood
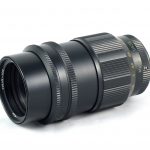
Tair-11A 135mm f/2.8
Tair-11A 135mm f/2.8
Tair-11A 135mm f/2.8
The 20 blades inside the Tair-11A
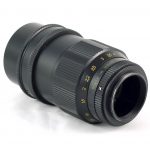
The screwn-on M42 mount on the Tair-11A
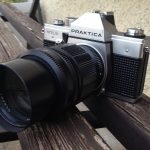
With reference for scale, the Tair-11A is still more impressive.
Made in the 1970s, this telephoto lens has a 42mm screw mount. The closest focus distance is 1.2 meters, and the aperture spans from f/2.8 down to f/22.
It is a pretty common focal length, 135mm is ideal for portraits that need to accurately render facial features. The maximum aperture is only high to average grade. The KMZ brand is popular, originating from U.S.S.R., and is known for its popular Zenit reflex cameras range, contemporary to the lens. Nothing amazing at first glance. To perceive the originality of this lens, you will need to look closer.
First, it is a heavy rock solid lens (600g/1.32lbs!). Its interior technology is extremely simple and as least as much less prone to mechanical defects. There is not a single automation: oviously no autofocus, but no automatic aperture control either. We’ll get back to this a bit later.
Then, when looking still closer, inside the beast, we count the aperture blades: one, two, three… nine, ten… fourteen, fifteen… eighteen, nineteen, TWENTY! From one end to the other on the aperture scale, the diaphragm forms a nearly perfect circle. This is the promise for really nice background blur.
We count the aperture blades: one, two, three… nine, ten… fourteen, fifteen… eighteen, nineteen, TWENTY!
Lacking automatic aperture control, the feature that maintains the widest aperture during composition and closes the diaphragm a fraction of a second during the shot, the Tair-11A offers manual aperture preset instead. One has to select the aperture using a first ring before composing the picture. Then only does the photograph set focus and composition. Then again, before shooting, he has to close the diaphragm using a second ring that stops at the aperture selected earlier. Then only: click, clack, and start again. Tedious!
After some time getting used to it, I managed to correctly handle it coupled to a nearly as robust Pentacon Praktica MTL3, its cousin from the other side of the iron curtain. Here are the results.
Tair-11A 135mm f/2.8 – Paris – Kodak Ektar 100
Tair-11A 135mm f/2.8 – Paris – Kodak Ektar 100
Tair-11A 135mm f/2.8 – Paris – Kodak Ektar 100
Tair-11A 135mm f/2.8 – Paris – Kodak Ektar 100
Tair-11A 135mm f/2.8 – Paris – Kodak Ektar 100
Tair-11A 135mm f/2.8 – Paris – Kodak Ektar 100
Tair-11A 135mm f/2.8 – Paris – Kodak Ektar 100
Tair-11A 135mm f/2.8 – Paris – Kodak Ektar 100
Tair-11A 135mm f/2.8 – Paris – Kodak Ektar 100
Tair-11A 135mm f/2.8 – Paris – Kodak Ektar 100
Tair-11A 135mm f/2.8 – Paris – Kodak Ektar 100
Tair-11A 135mm f/2.8 – Paris – Kodak Ektar 100
Tair-11A 135mm f/2.8 – Paris – Kodak Ektar 100
Tair-11A 135mm f/2.8 – Paris – Kodak Ektar 100
Tair-11A 135mm f/2.8 – Paris – Kodak Ektar 100
Tair-11A 135mm f/2.8 – Paris – Kodak Ektar 100
Tair-11A 135mm f/2.8 – Paris – Kodak Ektar 100
Tair-11A 135mm f/2.8 – Avon – Kodak Ektar 100
Tair-11A 135mm f/2.8 – Avon – Kodak Ektar 100
The Tair-11A lenses are found on eBay from around €100 to €150. Their sturdiness helps avoiding serious technical issues, and they are quite simple to service.
A big thank you to tatou_de_baudoin for letting me use this lens. Do not hesitate to ask in the comments if you have questions about the Tair-11A, and please share your pictures shot using this lens with me on Instagram. Have fun !
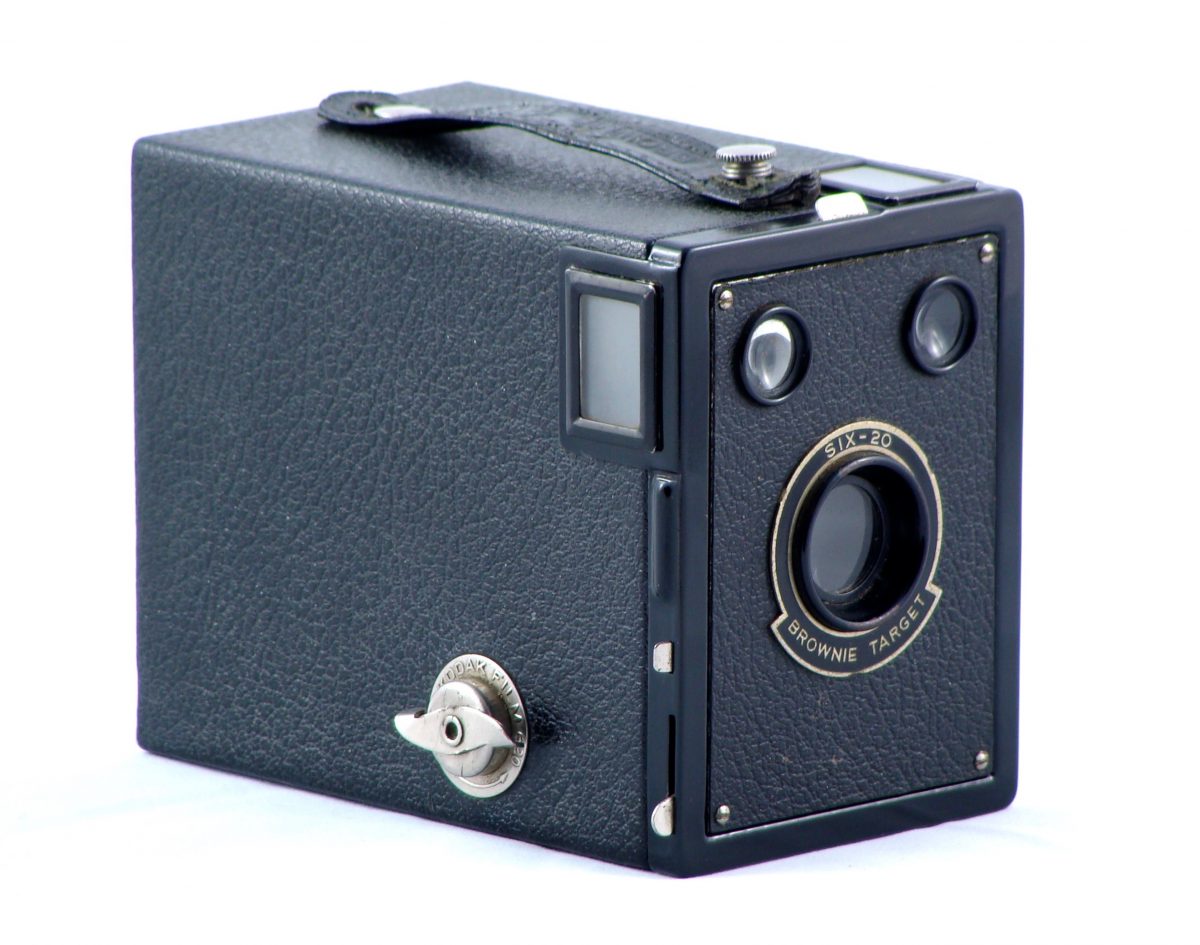
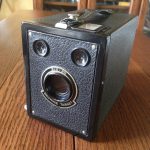
Found last year on a yard sale, this Kodak Six-20 Brownie Target box camera was in a very poor shape. At least the front face was, because everything else, mechanism, leatherette and handle, were still quite nice. Viewed from the front, multiple damages were visible: rust had gone through a great part of the metal frame, lifting almost all the black painting.
Initial state of the camera. – Avon – Ilford HP5
Was it reasonable to spend so much energy and time on a common box camera? Maybe not, but passion spoke. This has also been a good training exercise, without much at stake, that gave experience for next restorations to come on more valuable cameras.
Here is a step-by-step description of how I restored this Kodak box camera.
Disassembly
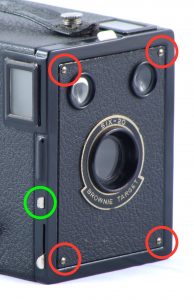
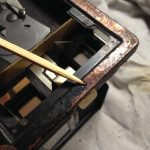
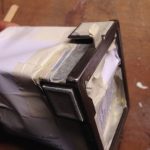
This box’s disassembly is limited to the removal of the front face plate, here covered with black leatherette. For your information, the manipulation will be similar on Kodak Six-20 Brownie Junior box cameras (with the art-deco faceplate). This plate is maintained in place by 4 screws, one in each corner (circled in red). It is also stuck in place by the time selection lever (circled in green).
Disassembly notes
For its removal, I had to remove the 4 screws, then flatten the lever using two pliers and a protective cloth to avoid any sratch. This is actually more easy than it seems, and this method will work on many other Kodak boxes (e.g. the Beau Brownie).
Scraping
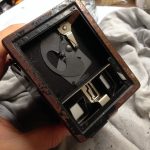
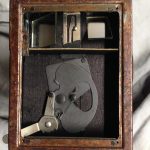
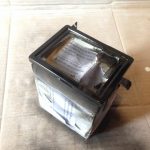
I got access to the entrails of our camera!
First operation: I had to remove all the residual black paint. I could not paint over it, that would have looked awful. On top of that, the new paint would have peeled off again quickly.
The entrails of my Kodak Six-20 Brownie Target camera.
A squatting carcass! Take advantage of this operation to clean the inside of your camera.
Scrape the paint residues using a wooden tool.
On my camera, the paint fell under the simple pressure of a wooden tool. You need patience here, and you’ll get rid of the most stubborn residues later when sanding.
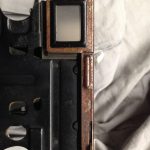
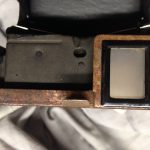
Note the edges of both viewfinders: I kept the original black paint here as it was still OK.
The camera front properly scraped off of all paint. The rust did not look very thick.
Left view. The viewfinder as been kept as is, in good original state.
Top view
Sanding
Once the old paint removed, it’s rust that had to be suppressed. Here, the corrosion was general but quite thin. A simple sheet of sandpaper, with fine grit (P180), was enough to get the underlying iron to show up again. In narrow places, I had to slide a folded part of sandpaper using a thin tool: a small screwdriver or a toothpick.
On larger areas, one could also work with steel wool. Be careful to wear gloves during the operation.
I began sanding the bottom of the camera in order to test the strength of both the rust and iron.
On the left, some embossed design I had to go over using a small tool.
The face is totally sanded and the iron shines!
Cleaning
Time to clean the insides of the camera, especially mirrors and viewfinders. My own camera had a detached mirror I had to glue back once the painting done.
All the dust created during the sanding needed to be properly wiped and blown off to avoid trapping it under the new paint.
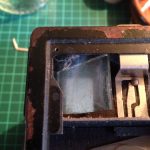
Preparation for painting
That’s the vital step! All the parts that we do not want painted over must be shielded, especially lenses, mirrors and viewfinders, or the camera will become unusable.
Of course, I worked only with the metal body of the camera, leaving the cardboard box aside.
To protect the remaining parts, I used masking tape of good quality. I cut down custom shapes to cover the levers and the viewfinders (ground glass and metal frame).
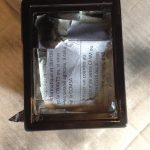
To protect larger areas, I used paper as a shield. A piece of letter paper masked the whole internal parts of the Brownie Target: shutter mechanism, lens, mirrors, etc., and other sheets masked the outside of the metal body.
Finally, I chose to cover the tiny screw threads: I guessed it better not to have to apply force on almost hundred years old screws during reassembly.
The mechanism and lens inside are totally shielded using a piece of letter paper. Note the tiny pieces on each corner to protect the threads.
Custom shapes shield the viewfinders and the levers. The rest is wrapped in sheets of paper.
The longest part eventually done, I placed the camera on a large cardboard protection that would avoid spraying paint on my walls. Now the fun begins.
Painting
I chose glossy black spray paint to get a smooth finish. Take the time to test your paint spray before doing anything else. This way you’ll pre-stir the paint, you’ll test the spraying distance, you’ll check if the colour is correct, and you’ll notice any issue (like a defect nozzle stuck on pressed position, speaking from experience here!).
Application is usually made in several passes: different angles, and several coats. It’s usually difficult to find a way to place the camera on the ground and still access every part to paint, but in my case I only had to put the camera down on its back, and I turned around it with the spray.
You have to hold you can around 20 to 30cm from the area to paint, doing quick and regular strokes. Never ever spray more than a second on a same spot! Else it’s the dripping disaster guaranteed. 😮
Do only the required strokes to apply a first coat of paint on the whole area. Visible lacks of paint will be covered during the next 2nd, 3rd or even 4th passes.
First coat of paint. The part on the left still shows some metal, this will be covered by the next coating.
Second coat. The paper shields do a great job blocking the black paint.
Drying time between to coats of paint is at least one hour for the one I applied on this camera. Check your own paint drying requirements. And do not put down your fingers before letting the paint cure for at least 24 to 48 hours. The surface may look dry, but underneath it is still soft and you’ll leave your mark (literally).
Reassembly
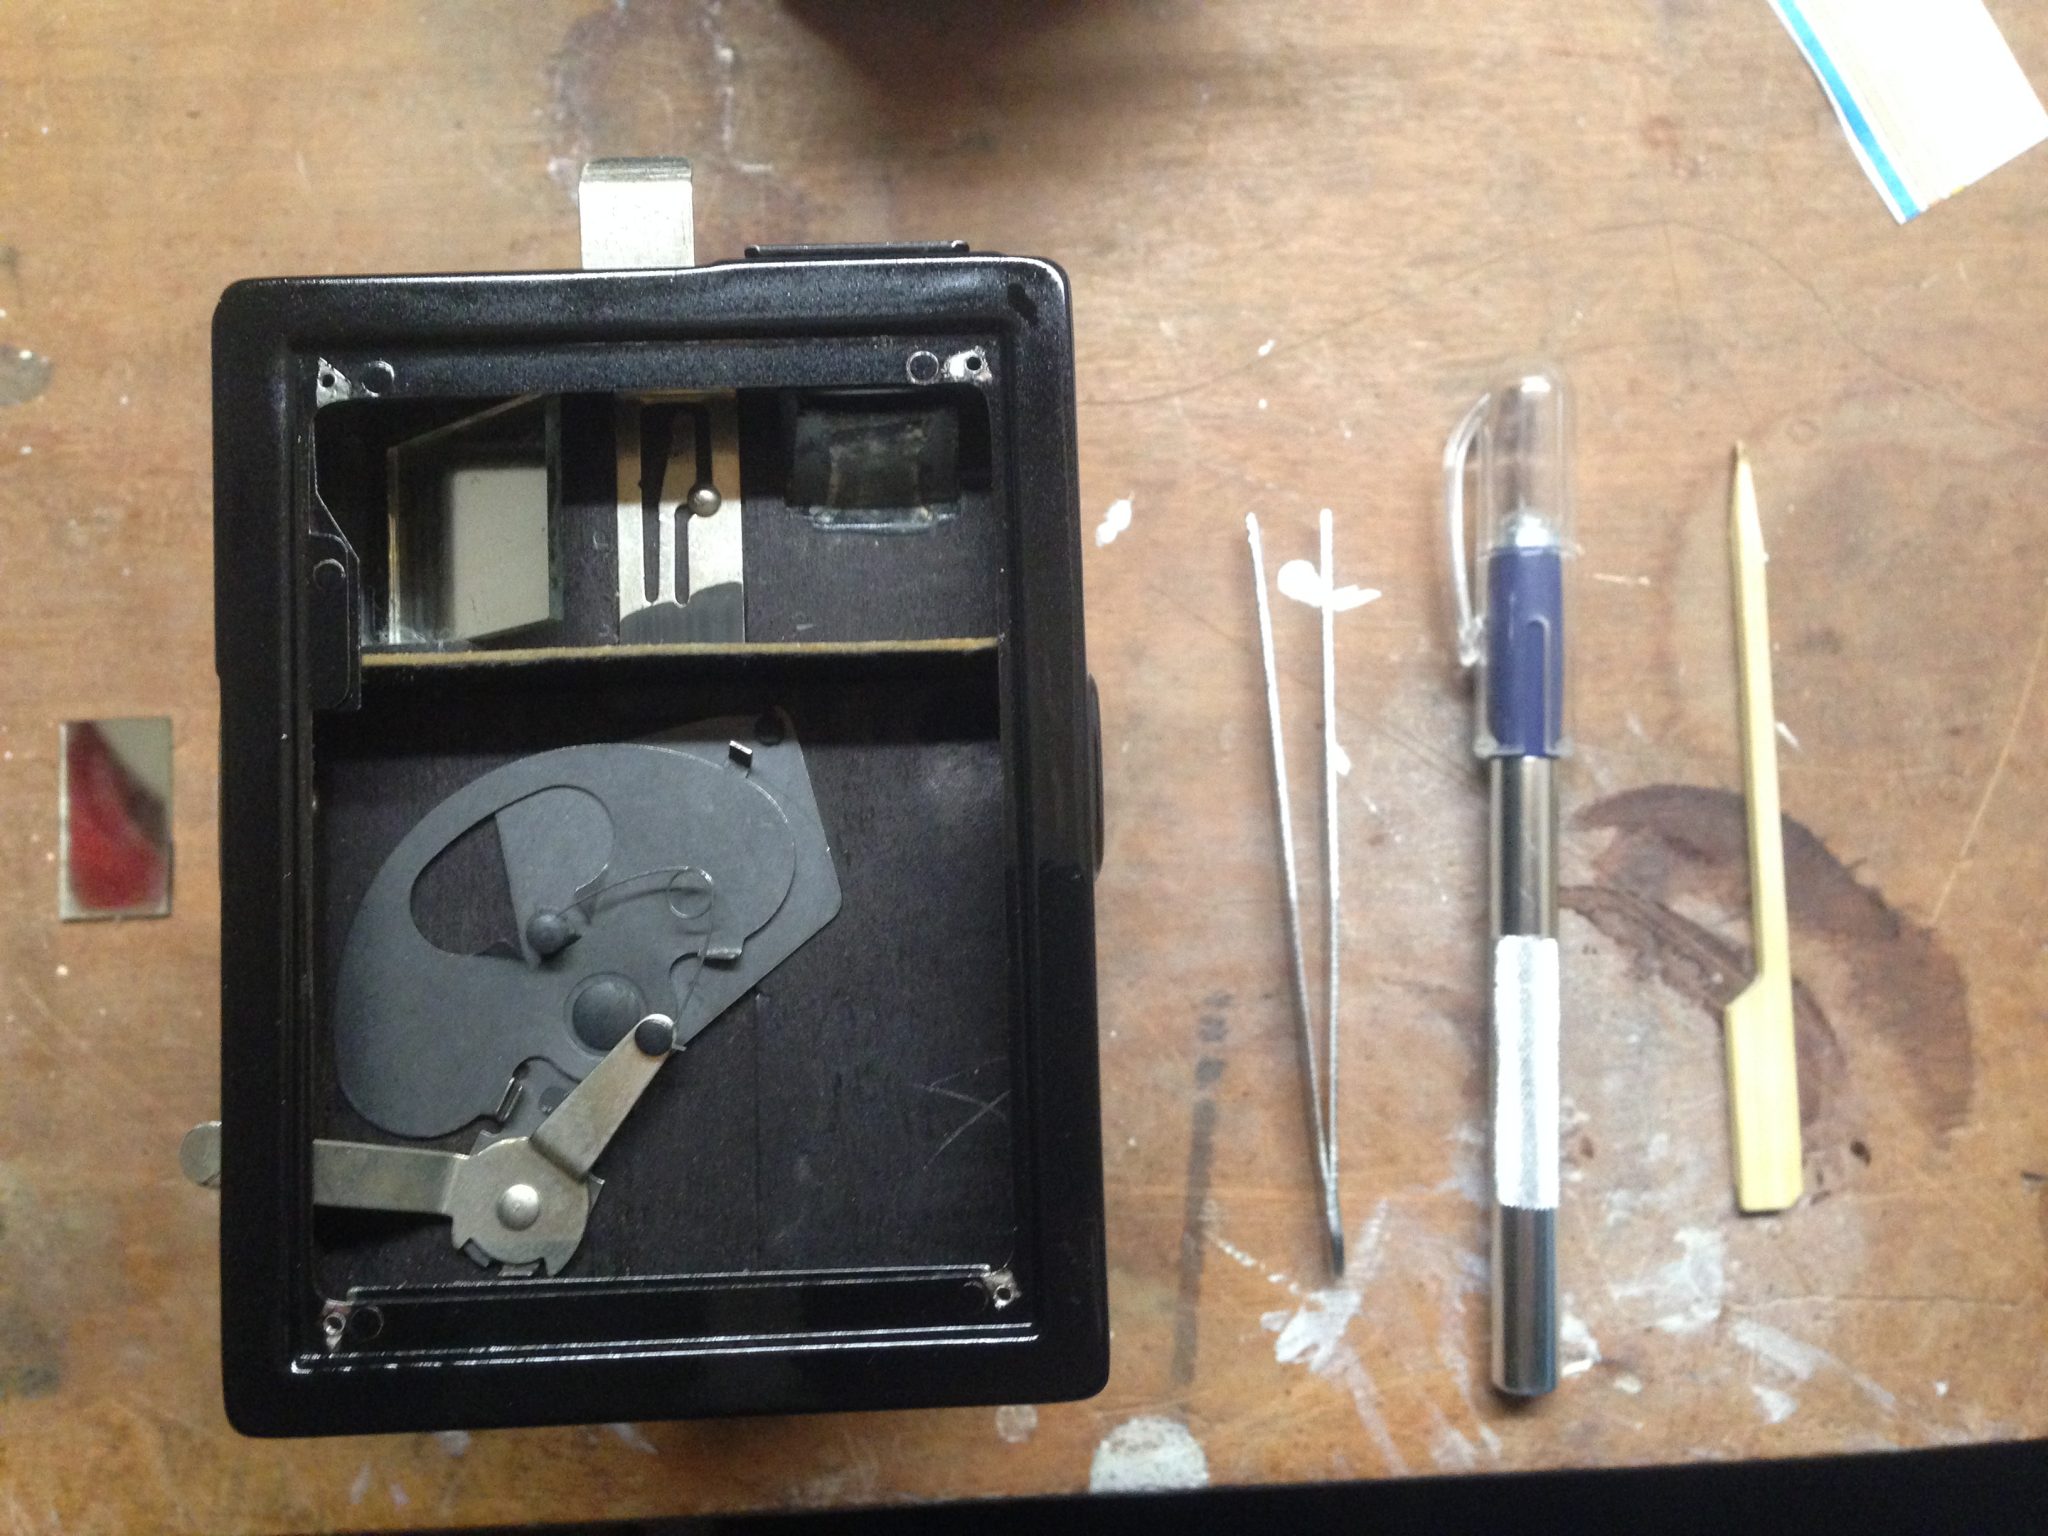
Once the paint had totally dried, I removed the masking tape by pulling at a 45° angle. This way it did not tear the paint work. You can use tweezers to remove small pieces. Avoid larger cutters that’d slip and scratch your nice new paint.
48 hours later, here are the tools to remove the masking tape. Be careful not to use cutters on fragile fresh paint or lenses.
Reassembly is easy, I followed the assembly steps backwards: inserted the timing lever back in its slit, put the faceplate in position and placed the screws, then gave the lever its original shape back using the same pliers. I closed the back of the camera. And I finally took a satisfied look at my near mint Kodak Six-20 Brownie Target camera!
The result! The new paint colour is really similar to the original, seen on the viewfinders frames.
The result! The new paint colour is really similar to the original, seen on the viewfinders frames.
Finish is very smooth thanks to the use of spay paint.
Like new!
Like new!
Like new!
Like new!
Like new!
Conclusion
Some feedback in conclusion:
This restoration happened several month ago already. I needed to check if the paint is resilient, and it is. I’m really happy with the result!
What I would not do again: put my fingers on the fresh paint! I’m the only one to see the defect, but it’s the first thing I see every time I look at my work… 🙁
What I would do again: spray paint is the right choice, and I’ll try a matte version for my next camera work.
If you have advice to complete this guide, or questions before doing your own restoration, do not hesitate and leave a comment or contact me directly on BlueSky or Instagram.
Spring is here, and yard sales season is on! Last month already brought home an Olympus OM10 SLR in excellent shape, mounted with a standard Zuiko 50mm f/1.8 lens.
A quick foam replacement and two PR44 batteries later (no introduction needed since you read the recent Polaroid and Ricoh articles), and let’s go! I unearthed a long time expired Kodak HD200 color film roll and went for a walk.
Until I write a proper review, please enjoy these satisfying results. I’ve got another Ilford FP4 roll awaiting development, and some DIY on a real gem found last Sunday (yes, I’m teasing).
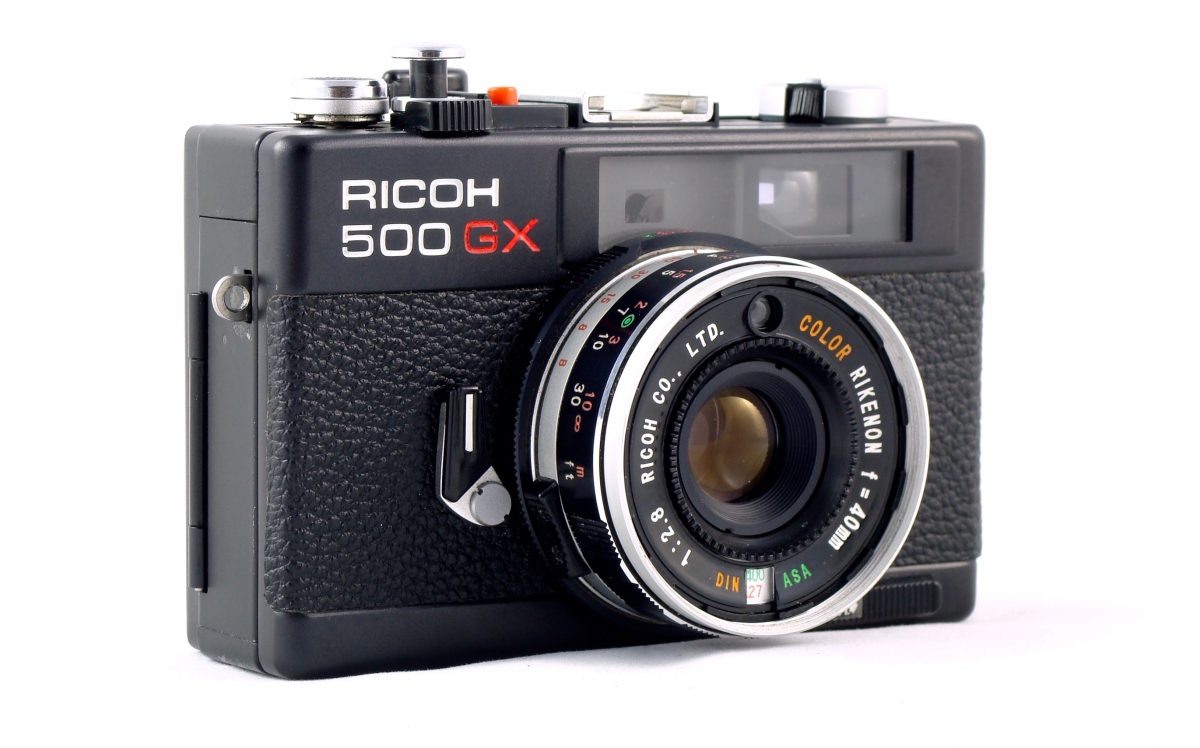
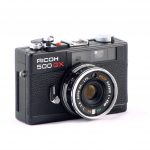
One chilly morning of car boot sale in the region of Paris, I stumbled upon a small camera that turned out to be a really serious rangefinder: the Ricoh 500GX. And it’s been love ever since!
Introduction
Sold from 1976 to 1980, the 500GX is a really compact and robust camera, made out of metal. Its reasonable weight, 420g, makes it easy to handle, while its slim size makes it easy to carry away and even drop inside a large jacket pocket. My specimen is all black, but Ricoh also sold a more common silver version.
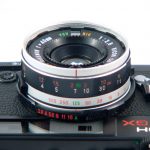
The lens is a Color Rikenon f/2.8 and focal length is a versatile 40mm, even if I would dream it a bit shorter for street photography. Focusing is done through a coupled rangefinder and goes as close as 90cm from subjects.
The default aperture priority mode is easily disabled to get the Ricoh 500GX into full manual mode.
Shutter speeds go from 1/8 s to a comfy 1/500 s that enables the use of the widest aperture. Long exposure is possible by using the Bulb position. Flash sync is supported at all speeds. Things are getting serious when you start looking at auto exposure: the default exposure mode is a very convenient aperture priority. The selected aperture is shown facing the meter needle inside the viewfinder. Note that the meter is located just above the lens, and is covered by whatever lens filter you may need. More importantly, this default mode is easily disabled to get the Ricoh 500GX into full manual mode.
The viewfinder displays a clear but tiny rangefinder patch. On the right side, the metering needle runs through the different possible apertures. A light press on the shutter release locks the selected aperture and lets you compose your frame with the desired exposure. Over and under-exposure do not prevent the camera from taking the picture, as would a New Canonet 28. It is too bad, though, that the lens barrel had to take so much space in the viewfinder!
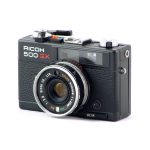
Ricoh 500GX – Front view
Ricoh 500GX – Front view
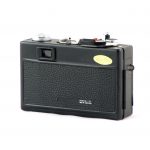
Ricoh 500GX – Rear view
Ricoh 500GX – Color Rikenon 40mm
Tormented ergonomics
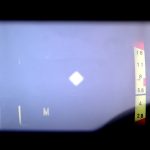
Inside our viewfinder, a small capital “M” reminds us whenever the auto-exposure mode is disabled. However, nothing indicates the selected aperture in this situation. Actually, either in manual or auto-exposure modes, the 500GX does not display anything about the speed: be careful not to select slow speeds! This only foreshadows all the oddities this camera has with ergonomics.
In my previous post reviewing the Nikon F-501AF, I was unveiling the evolutions of modern autofocusing systems. While at the time Ricoh released its camera there already existed consumer grade rangefinders with advanced designs, such as the Canon P, the 500GX has hard times integrating the new accessories in a body still more compact. It actually shows how uncertain makers were when they integrated the new electronics and creative mechanisms in their cameras.
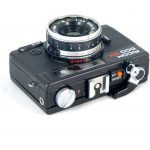
So, the 500GX is a small very regular black brick, on top of which a mad designer decided to put, here and there, wherever it pleased him, funny buttons and levers.
A mad designer decided to put, here and there, wherever it pleased him, funny buttons and levers
First, the shutter release is quite long. The button actually looks a lot like the end of a cable release transplanted on this small camera. OK, why not? But the lump it creates ensures accidental release whenever you’ll carry the camera with you!
In order to bypass this issue, that came up with the parent iteration of the small Ricoh, designers introduced a new shutter lock lever that users have to turn 45 degrees to get the camera ready. Unfortunately, without any reminder of this shutter lock in the viewfinder, you will undoubtedly curse as I did numerous times against this curious design.
Finally, filling the remaining space on the top cover, a small red blister acts as a battery checker. And in case you ever forget what this red thing does, there is a giant sign with big capital letters saying “BATT CHECKER”. Trust me, you’ll remember what this is.
Because not everything is all black, note the actual good idea: two red/green indicators that tell you quickly if there is film inside the camera (next to the rewind knob) and whether the shutter is cocked (next to the advance lever).
Ricoh 500GX – General view of all the happy buttons and levers on this camera
Into the 500GX’s viewfinder, the bare minimum. The M indicates that it is in Manual Mode. In the lower right corener, the lens barrel partly masks the view.
The Ricoh 500GX’s blisters. On the right of the “L” lever, the good idea: a cocked shutter indicator.
The red/green indicator next to the rewind knob tells if there is a film inside the camera. The small black rounded cover hdies the rangefinder adjustment screw.
The sliding button for multi-exposure.
Another novelty since the parent iteration: the 500GX comes with a multi-exposure mechanism. It was fine to separate it from the main cocking system. But was it necessary to place it so far from all other commands, on the complete opposite? Oh, and since this slider button is already unreachable, was it a reasonable idea to pair it with still another type of button, round and flat and so not manipulable that you have to crush it with your finger in order to make it turn a few degrees? Well, at least rest assured, dear Mr. Designer, that no one will ever activate multi-exposure by mistake.
Yet I still love it
Despite all these design flaws, the tiny Ricoh knows how to make itself lovable.
It is very easy to get ready to shoot: use one PR44 battery to bring it to life, the exact same I was recommending in Type 100 Polaroid cameras. But even without battery, you can shoot in manual mode at all speeds, only the light meter won’t be available. If needed, the rangefinder is easily adjustable from outside, under a tiny rounded cap next to the accessory shoe. Do not hope to get your hands inside the beast so easily though, leave this arduous task to professionals.
All the issues mentioned above will only be avoided by the means of a complete and practical learning process using this camera. And the Ricoh 500GX, with the ability to carry it everywhere and anywhere, offers the keys for fulfilling this training. And eventually, this work will be rewarded with high quality pictures.
Some pictures
I’ve been walking around for about a year with the Ricoh 500GX. You will find below some pictures shot in various situations, various light conditions and on various film types: Kodak Ektar 100, Kodak Portra 400, Ilford HP5 Plus 400, and Ilford FP4 Plus 125.
Nancy – Kodak Portra 400
Paris – Ilford HP5
Paris – Kodak Ektar 100
Fontainebleau – Kodak Ektar 100
Paris – Ilford HP5
Durfort – Kodak Ektar 100
Paris – Ilford FP4
Avon – Ilford HP5
Fontainebleau – Ilford HP5
Paris – Ilford HP5
Paris – Ilford FP4 – Double exposure
Do not hesitate to ask in the comments if you have questions about the Ricoh 500GX, and please share your pictures shot using this camera with me on Instagram. Have fun !