A Camera – the Konica Auto S2

In the available selection of vintage rangefinder cameras equipped with fixed lenses, the premium lineup is mainly characterized by large apertures offerings. Most renowned are the obvious Canon’s Canonet, Minolta’s Hi-Matic or Yashica’s Electro 35 ranges, among which some models open as wide as f/1.7.

While today a galloping inflation hits these sought after jewels (Canonet QL17 now usually costs more than €150), alternatives do exist, one of them being the less famous Konica Auto S2.

Introduction

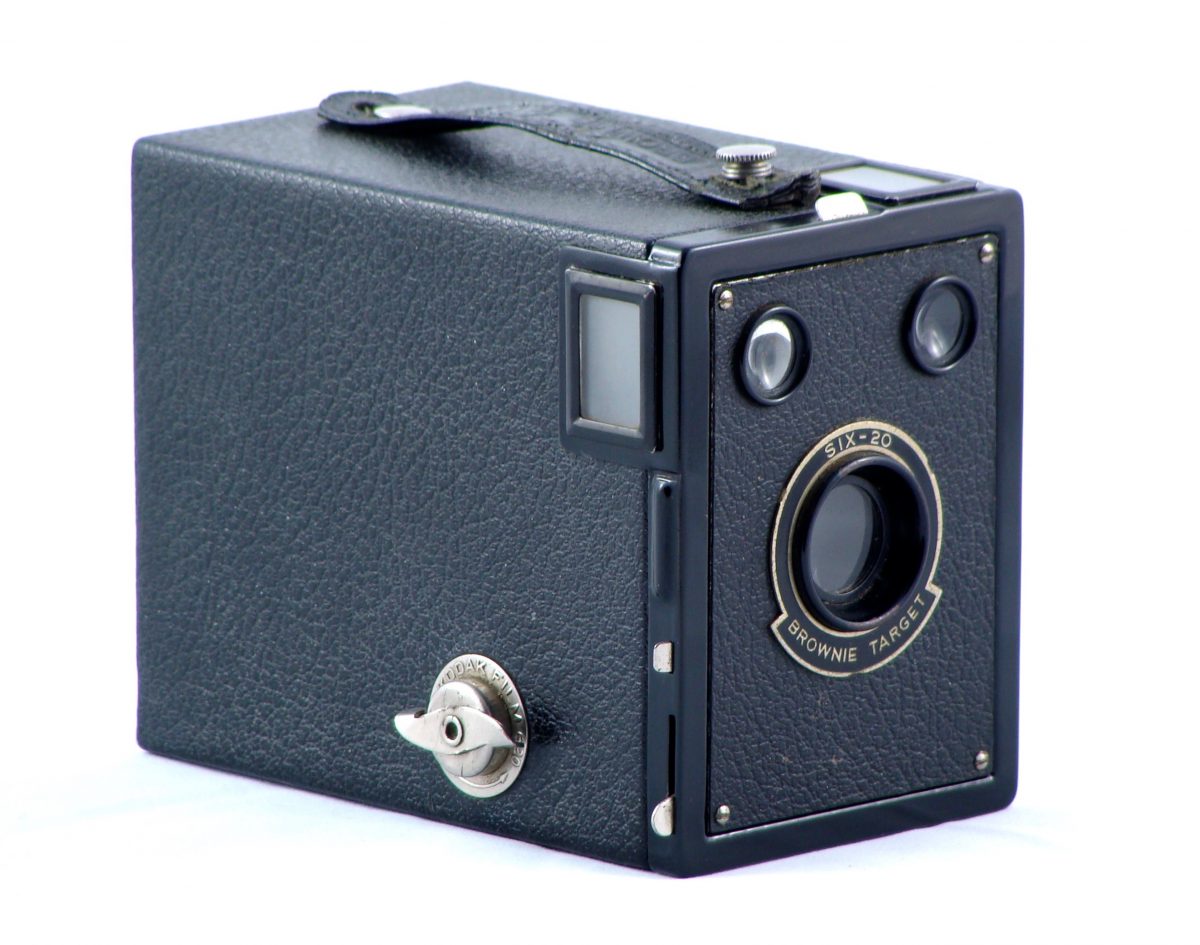
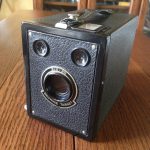
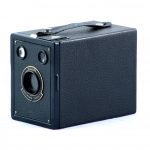
The Konica Auto S2 is a compact rangefinder camera, made in Japan and sold, in France, from 1966 until 1968. Compact, it quite is when it comes to the size, although a bit above average. But it is not lightweight at all: with 760g, it joyfully plays in the SLR league.

Size and weight do not make a sturdy camera. The front element containing the optics is… wobbly, which seems to be an aging condition of some, if not all, the items in the S2 series.

So what did Konica put into its heavy and rickety camera that make it a little bit special?

A premium range tank

First, the camera’s size gives it a good and firm grip with enough space for both hands on both sides of the lens barrel. Focusing is easily done with the tip of the left hand finger. Held like this, its weight is quickly forgotten.

The lens barrel sports the Hexanon 46mm lens, opening wide, really wide, up to f/1.8. This aperture was more common in SLR kits at the time the Auto S2 was sold, and it was meant to be the top premium offering for fixed lens rangefinder cameras. The Hexanon formula piles up 6 individual lenses in 4 groups and has very good reputation.

The Hexanon 46mm lens opens wide, up to f/1.8

The shutter is a Copal SVA that performs up to 1/500th of a second. Slow speeds also rise up to 1 second. Exposure is set either using the shutter speed priority mode relying on a CdS type cell fueled by a PX625 battery, or by choosing both aperture and speed manually. The light meter stays active in both cases.

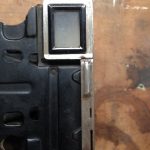
The S2’s viewfinder is really bright. Even in dimmed light situations, it is possible to distinguish the rangefinder patch. Another clue of the premium range positioning: parallax is automatically corrected by a moving frame in the finder dependent on the selected focusing distance. Finally, even if the main display of the light meter takes place on the top of the camera, the same reading is possible in the viewfinder, reflected by internal mirrors above the picture frame. A needle moves between minimum and maximum aperture marks when the photograph selects a shutter speed. The only action left is to take the picture!

When it comes to flaws, the Konica Auto S2 has some. First of all, the camera is not easy to use if you wear glasses like me. You’ll have to get close to the viewfinder to read all the provided informations. What’s more, when using the manual exposure mode, fat fingers will have issues selecting an aperture without changing focusing distance at the same time.

Finally, an additional reading of the selected speed would have been nice to have. It is easy to select a slow speed without really knowing, and then end up with blurry pictures!

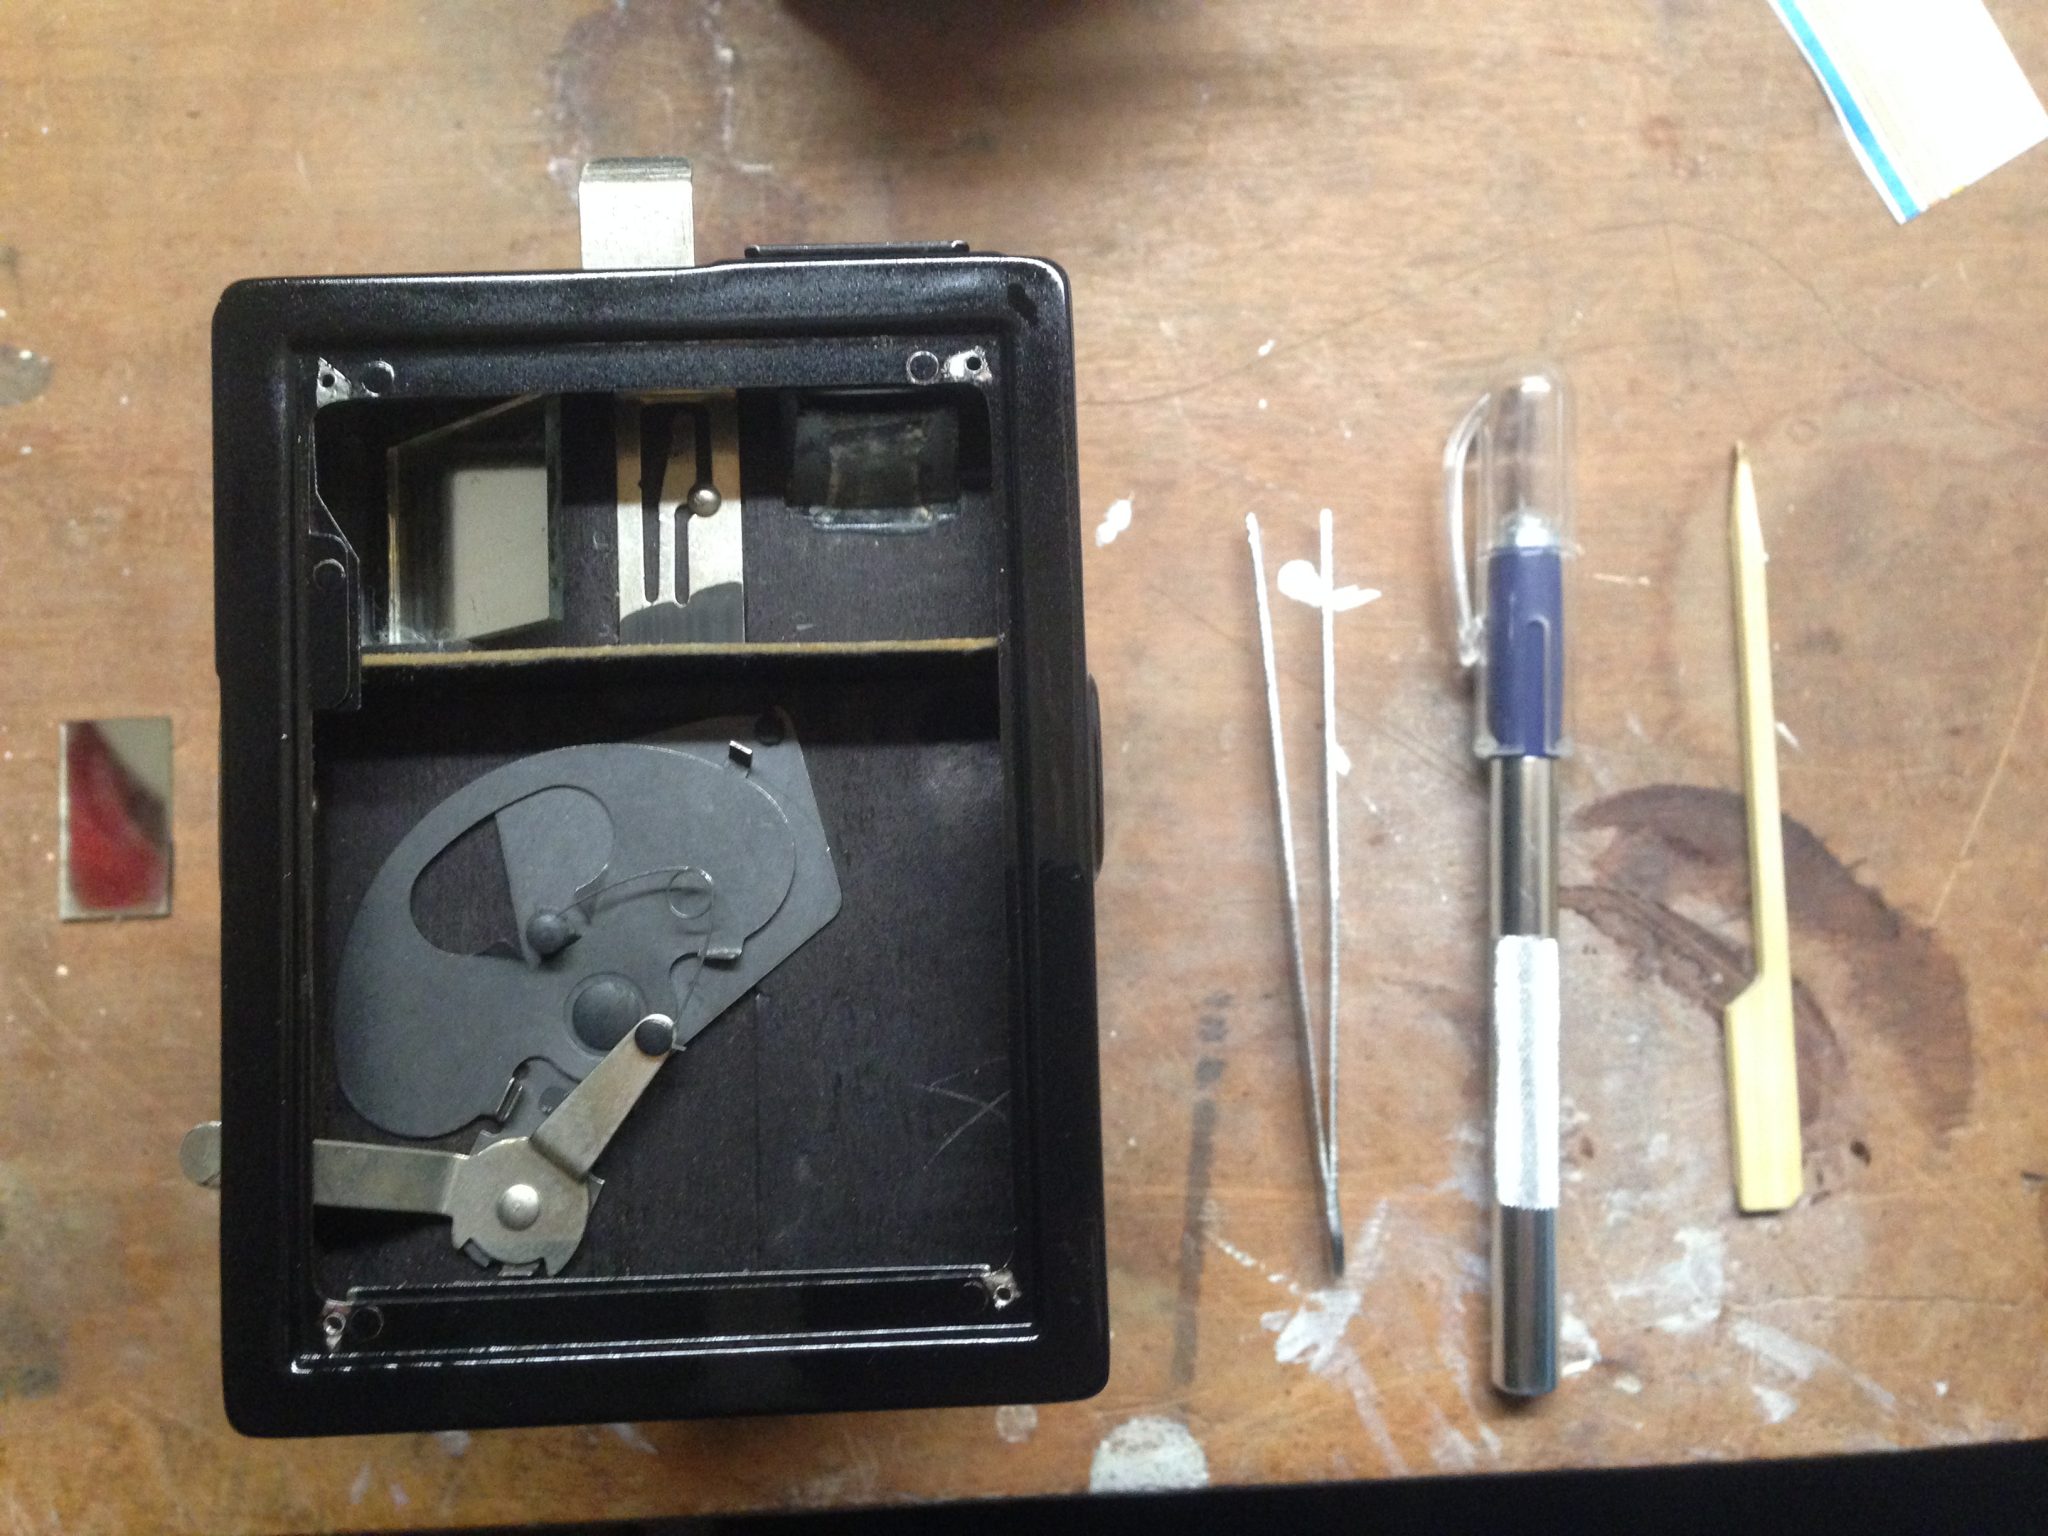
On the operating table

I did not use my Konica Auto S2 on its first day home. When it arrived, the patient was seriously sick: a hella lot of dust everywhere (and still now…), no rangefinder patch in the viewfinder, aperture blades desperately stuck together… Operation was unavoidable.

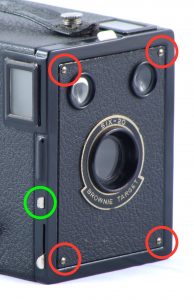
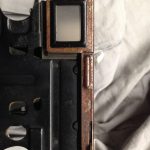
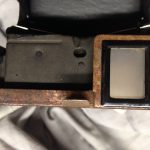
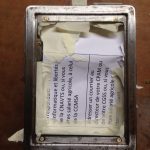
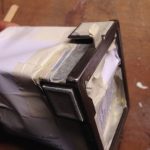
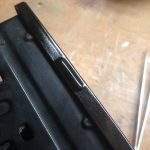
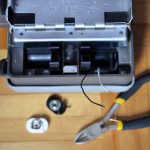
Top cover disassembly is really simple: no screws, the cover is only held by the advance lever, the base of the shutter button, and the rewind crank, all easily unscrewed by hand (or using a friction tool).

Top cover disassembly is really simple: no screws.

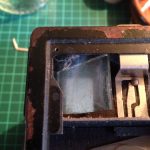
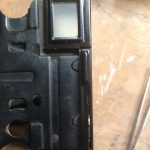
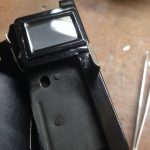
The rangefinder mirror was loose in the viewfinder chamber. This is a surface coated mirror. It is therefore possible to fix it using UV glue, quick and reliable strategy. Adjustment is then made, top cover on, using the holes under the accessory shoe giving access to the setting screws.

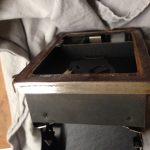
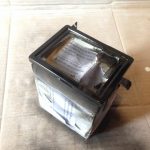
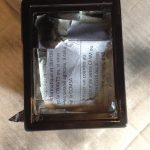
Front lens disassembly, also quite simple, lets you properly clean old grease off the lenses and shutter mechanism. Accessing from the inside is doable but a lot more tight, yet it is mandatory if you need to clean the rear lens element. In the S2, there is no need to disconnect the light meter circuit in order to access all parts, as long as wires are carefully manipulated.

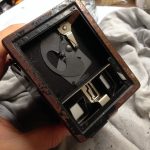
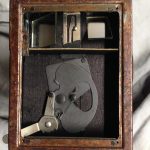
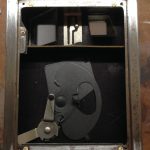
Surprise! The lightmeter is a Sekonic module!

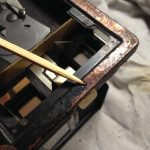
In order to unstick the aperture blades, a few drops of naphta on the blades are sufficient. Activate the mechanism a couple of times to spread the product and check that everything runs smoothly. The Copal SVA shutter seems robust, all speeds sounded just right in spite of its age.

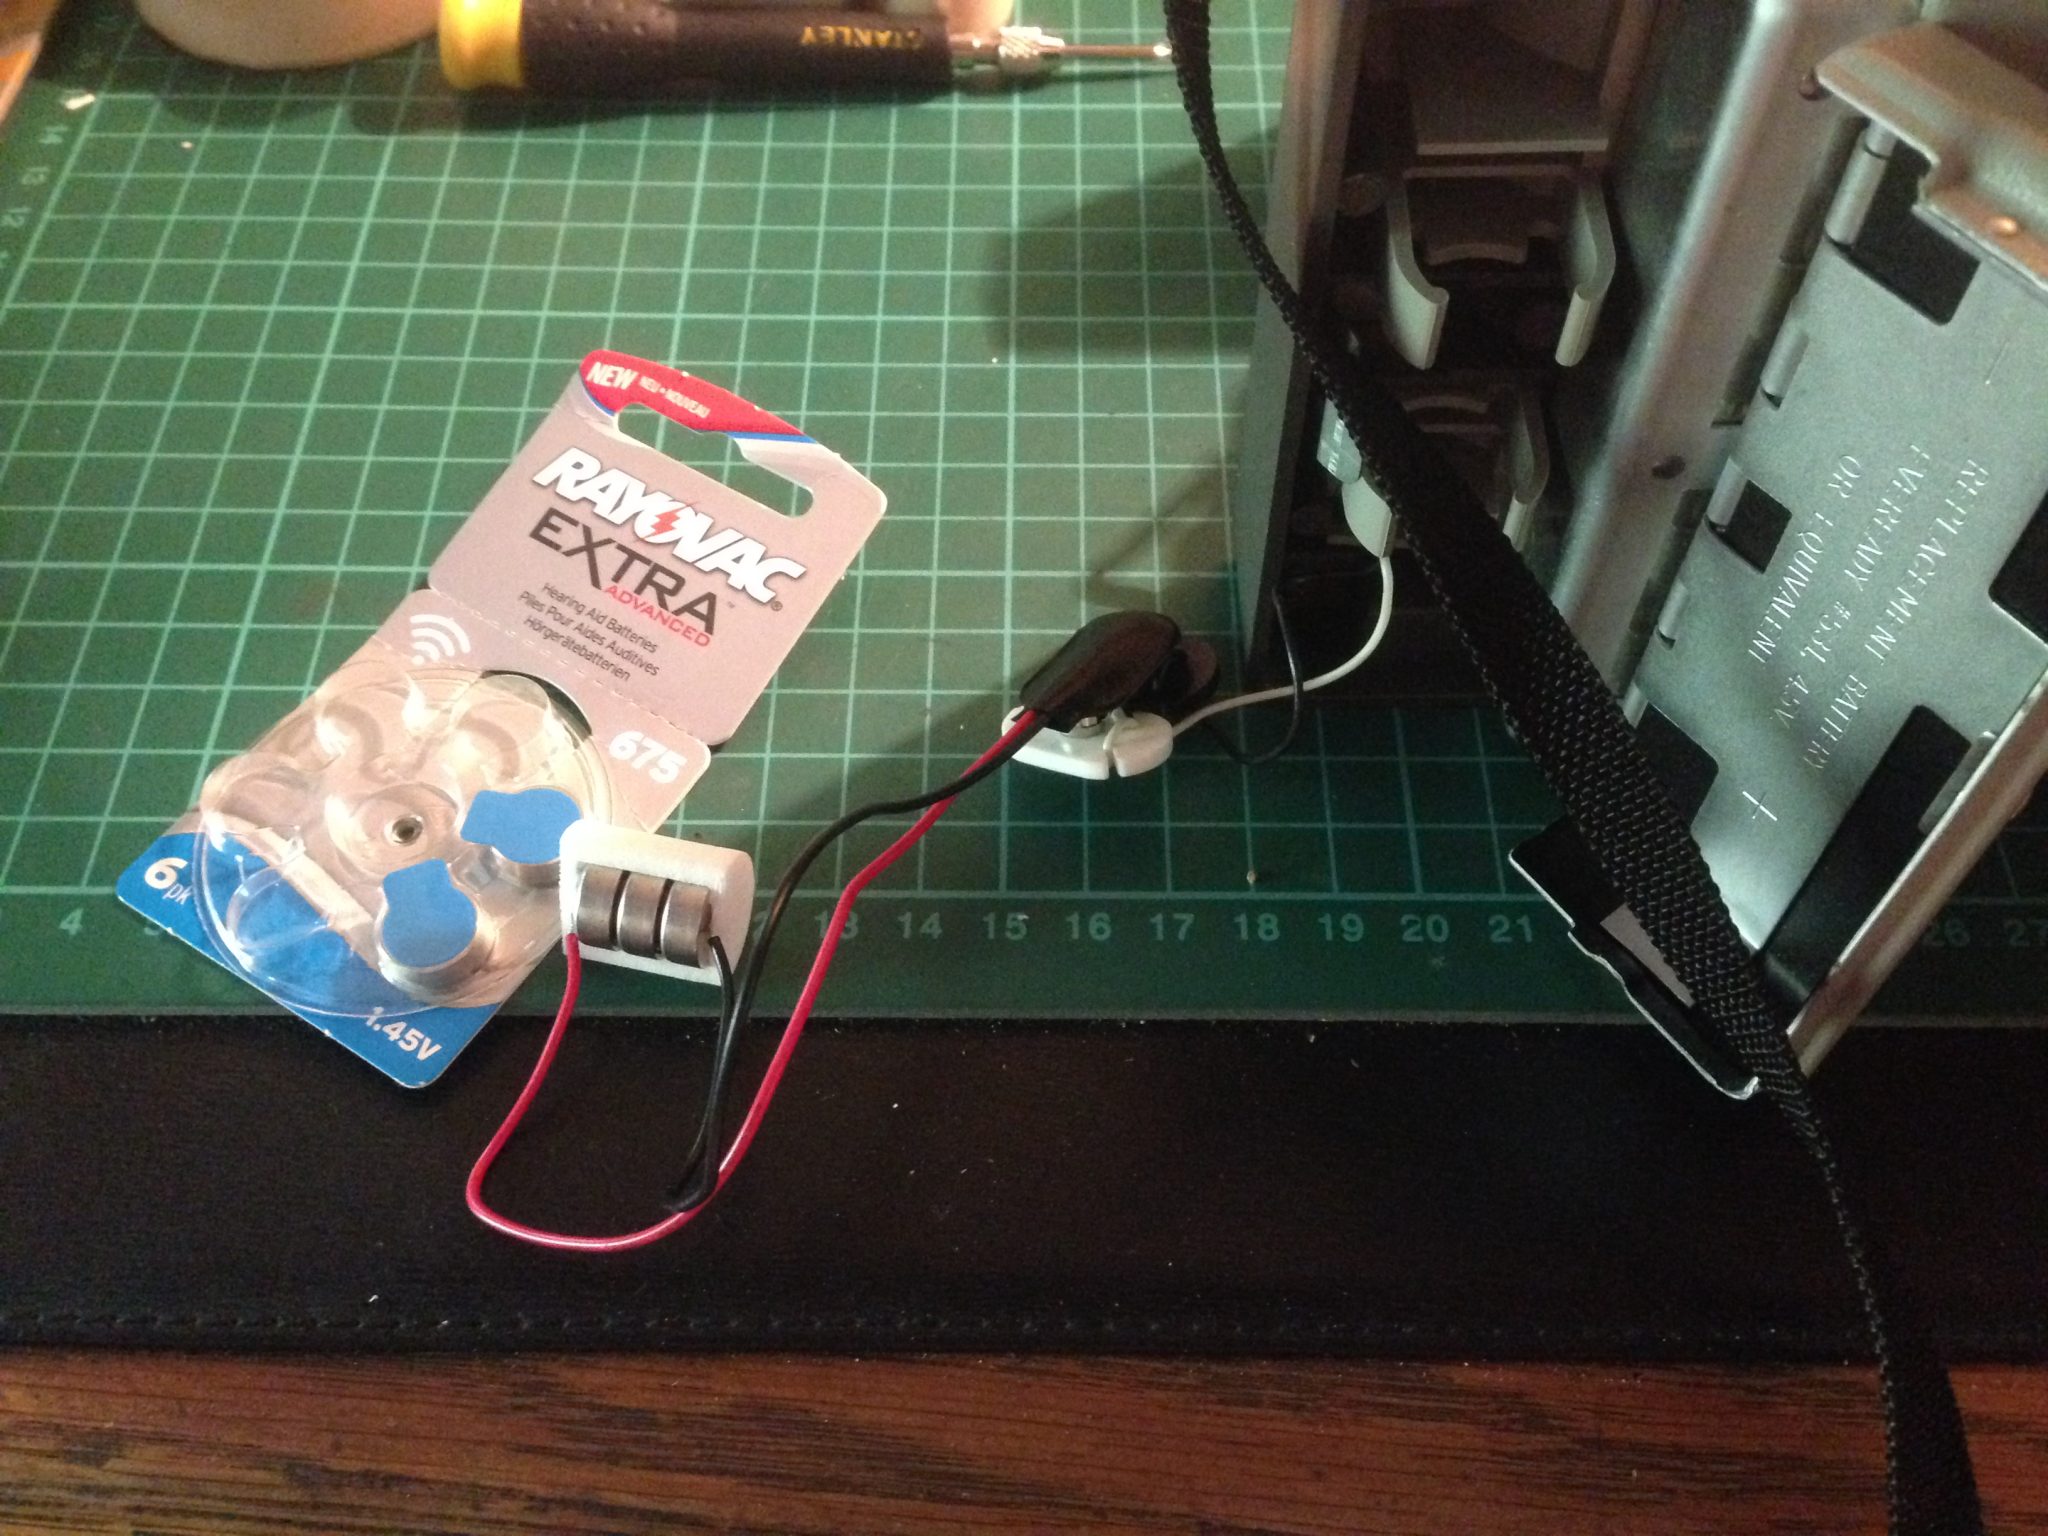
Surprise! Under the top cover, the light meter shows its brand, and not any brand: this is a Sekonic module! It originally ran using a PX625 mercury battery. If you follow this blog, you know how to replace it: simply use a PR77 battery with a shim that fits the battery compartment. Note also that a regular 625A alkaline gives sufficiently correct readings.

Patient finally out of surgery, let’s fit a roll of Ilford HP5 inside the camera and screw a yellow or orange 55mm filter and shoot!

Using the Konica Auto S2

Handling the Auto S2 wipes away its heavy weight. The very bright viewfinder eases focusing and framing. Firing the shutter is a quiet operation, but advancing the film is not! So much for discretion.

The light meter cell is placed just above the lens, and thus enables the use of colored filters. The wide aperture makes interior pictures quite easy to manage. And finally, the Hexanon lens produces really nice images!

Do not hesitate to ask in the comments if you have questions about the Konica Auto S2, and please share your pictures shot using this camera with me on Instagram. Have fun!

More info

Usage and repair notes for Instamatic 500

Aside from my article where I discover the Kodak Instamatic 500, here are some side notes about its usage and repair.

Indeed, information for disassembly or adjustment of the Instamatic 500 is very scarce, and I thought it might help to write about some things I found useful.

Sensibility setting

The Instamatic 500 camera has no on-body sensibility setting. There is, however, a mechanical sensor that recognize a shape on the top of film cartridges corresponding to the film sensibility.

I did not find any documentation about this sensor position and you’ll have to trust your old cartridges for film sensibility indication.

Light seals

Note that, as for any 126 film camera,  the Instamatic 500 does not require any particular light seal attention: there are none. The film cartridge itself ensures light-tightness. But beware if using 35mm film in a reused cartridge: the back side window will let light through so don’t forget backing paper.

Plastic face fastening

The plastic facade of the Instamatic 500 tends to loosen with time: it is because the tightening screws are made of brass and are subject to corrosion.

These screws are found below the leatherette, the latter being very easy to unglue, and even more sometimes still correctly glues itself back in place. Just use a fine cutter blade to lift one corner, then gently pull up the leatherette pieces. The screws below are made of blackened brass, you can clean them and screw them back in place without applying too much force.

I did not push further but logic would have that removing all these screws, then the plastic faceplates, would get access to the cameras guts.

Lightmeter adjustment

If you strip your Instamatic 500, you will also find below the viewfinder a small metal cover hiding what seems to be the lightmeter adjustment mechanism. I did not mess with this myself, my lightmeter was just fine, and I am not sure how this works but in case you need to adjust yours, you’ll probably want to start looking this way.

Easily advancing 135 film

The main issue when using standard 135 film in an Instamatic camera is about correctly advancing the film. In 126 film, there is a hole that helps the camera to discover the correct position between each frames. With the Instamatic 500, there is a trick to advance the film just to the right amount, and without the need to shoot intermediate black pictures.

With 35mm perforated film, after a shot, you can then maintain the shutter release while in the same time maneuvering  the cocking lever: the latter will continue till the end of its course without stopping. Release the shutter release and, if needed, apply a final short stroke to the lever: you’ll be ready to shoot the next frame.

This is poor information, but I find it being a whole lot more that I have myself found online. If you have more precise questions, don’t be afraid to ask in the comments, I’ll sure take some time to have a closer look at my own cameras.

Restore paint on a Kodak Six-20 Brownie Target box camera

Found last year on a yard sale, this Kodak Six-20 Brownie Target box camera was in a very poor shape. At least the front face was, because everything else, mechanism, leatherette and handle, were still quite nice. Viewed from the front, multiple damages were visible: rust had gone through a great part of the metal frame, lifting almost all the black painting.

Initial state of the camera. – Avon – Ilford HP5

Was it reasonable to spend so much energy and time on a common box camera? Maybe not, but passion spoke. This has also been a good training exercise, without much at stake, that gave experience for next restorations to come on more valuable cameras.

Here is a step-by-step description of how I restored this Kodak box camera.

Disassembly

This box’s disassembly is limited to the removal of the front face plate, here covered with black leatherette. For your information, the manipulation will be similar on Kodak Six-20 Brownie Junior box cameras (with the art-deco faceplate). This plate is maintained in place by 4 screws, one in each corner (circled in red). It is also stuck in place by the time selection lever (circled in green).

Disassembly notes

For its removal, I had to remove the 4 screws, then flatten the lever using two pliers and a protective cloth to avoid any sratch. This is actually more easy than it seems, and this method will work on many other Kodak boxes (e.g. the Beau Brownie).

Scraping

I got access to the entrails of our camera!

First operation: I had to remove all the residual black paint. I could not paint over it, that would have looked awful. On top of that, the new paint would have peeled off again quickly.

On my camera, the paint fell under the simple pressure of a wooden tool. You need patience here, and you’ll get rid of the most stubborn residues later when sanding.

Note the edges of both viewfinders: I kept the original black paint here as it was still OK.

Sanding

Once the old paint removed, it’s rust that had to be suppressed. Here, the corrosion was general but quite thin. A simple sheet of sandpaper, with fine grit (P180), was enough to get the underlying iron to show up again. In narrow places, I had to slide a folded part of sandpaper using a thin tool: a small screwdriver or a toothpick.

On larger areas, one could also work with steel wool. Be careful to wear gloves during the operation.

Cleaning

Time to clean the insides of the camera, especially mirrors and viewfinders. My own camera had a detached mirror I had to glue back once the painting done.

All the dust created during the sanding needed to be properly wiped and blown off to avoid trapping it under the new paint.

Preparation for painting

That’s the vital step! All the parts that we do not want painted over must be shielded, especially lenses, mirrors and viewfinders, or the camera will become unusable.

Of course, I worked only with the metal body of the camera, leaving the cardboard box aside.

To protect the remaining parts, I used masking tape of good quality. I cut down custom shapes to cover the levers and the viewfinders (ground glass and metal frame).

To protect larger areas, I used paper as a shield. A piece of letter paper masked the whole internal parts of the Brownie Target: shutter mechanism, lens, mirrors, etc., and other sheets masked the outside of the metal body.

Finally, I chose to cover the tiny screw threads: I guessed it better not to have to apply force on almost hundred years old screws during reassembly.

The longest part eventually done, I placed the camera on a large cardboard protection that would avoid spraying paint on my walls. Now the fun begins.

Painting

I chose glossy black spray paint to get a smooth finish. Take the time to test your paint spray before doing anything else. This way you’ll pre-stir the paint, you’ll test the spraying distance, you’ll check if the colour is correct, and you’ll notice any issue (like a defect nozzle stuck on pressed position, speaking from experience here!).

Application is usually made in several passes: different angles, and several coats. It’s usually difficult to find a way to place the camera on the ground and still access every part to paint, but in my case I only had to put the camera down on its back, and I turned around it with the spray.

You have to hold you can around 20 to 30cm from the area to paint, doing quick and regular strokes. Never ever spray more than a second on a same spot! Else it’s the dripping disaster guaranteed. 😮

Do only the required strokes to apply a first coat of paint on the whole area. Visible lacks of paint will be covered during the next 2nd, 3rd or even 4th passes.

Drying time between to coats of paint is at least one hour for the one I applied on this camera. Check your own paint drying requirements. And do not put down your fingers before letting the paint cure for at least 24 to 48 hours. The surface may look dry, but underneath it is still soft and you’ll leave your mark (literally).

Reassembly

Once the paint had totally dried, I removed the masking tape by pulling at a 45° angle. This way it did not tear the paint work. You can use tweezers to remove small pieces. Avoid larger cutters that’d slip and scratch your nice new paint.

48 hours later, here are the tools to remove the masking tape. Be careful not to use cutters on fragile fresh paint or lenses.

Reassembly is easy, I followed the assembly steps backwards: inserted the timing lever back in its slit, put the faceplate in position and placed the screws, then gave the lever its original shape back using the same pliers. I closed the back of the camera. And I finally took a satisfied look at my near mint Kodak Six-20 Brownie Target camera!

Conclusion

Some feedback in conclusion:

  • This restoration happened several month ago already. I needed to check if the paint is resilient, and it is. I’m really happy with the result!
  • What I would not do again: put my fingers on the fresh paint! I’m the only one to see the defect, but it’s the first thing I see every time I look at my work… 🙁
  • What I would do again: spray paint is the right choice, and I’ll try a matte version for my next camera work.

If you have advice to complete this guide, or questions before doing your own restoration, do not hesitate and leave a comment or contact me directly on Twitter or Instagram.

Replace the battery in a Polaroid type 100 camera

Back in July, I made the near perfect discovery of a Polaroid 230. Brand new, in its box, with its original invoice dated from 1969 in djiboutian francs.

If you do not know this line of bellowed cameras (Polaroid 100, 200, 300…), think of them as massive devices shooting instant pictures the size of small postcards. Here is the beast, below, compared to a Canon SLR.

The challenge with this type of cameras consists in replacing a battery type that does not exist anymore in retail. The Eveready 531 or 532 was a quite large cylinder with snap connectors at both end. You can still find high priced substitutes, min. 10€, named A19PX.

Numerous times, I encountered tutorials on the web that demonstrated how to replace the 3 or 4.5V battery with respectively 2 or 3 AAA batteries. The idea is appealing, batteries found everywhere. But these specific mods require you to irreversibly destroy parts of your camera using cutting pliers and other instruments of torture.

Please be aware the following pictures show explicit content:

I’m now making a call: STOP! Do not butcher your cameras any more! Here is one solution, among others I’m sure, that will allow you to finally shoot packfilm for little money.

The required arsenal

Here starts the long list of the tools and items the substitution will require.

Batteries

You’ll have to find a substitute for a 3 or 4.5V battery. This requires 2 or 3 1.5V batteries. Among the smallest available, there are LR44 button cells.

Alcalines have major drawbacks when it comes to photography, we’ll probably address the issue in future posts. What is required here is an important capacity, much more than what standard LR44 can deliver. That’s what draws people to use AAA batteries instead.

The solution stands in zinc-air LR44 equivalents: PR44 coin cells. They can provide up to 6 times their sisters’ capacity. Voltage is a bit lower, 1.35V. It is not significant in our case.

The price? Hold on tight. In most cases, less than 1€ per unit. Even less if you catch a bundle, I paid 26 cents per unit for a 60 pack.

Connectors

The smartest of you will have already looked up the original Eveready battery with Google and they will have noticed that the snap connectors look the same as those from a 9-Volt battery. They are the same.

You’ll find these snap connectors for 25 cents max (e.g. at Selectronic). Pay attention to get a flexible connector, it will help with the camera’s large plastic connector holders.

Battery holder

That’s the tough part, you’ll have to use your imagination.

You can try to maintain the 2 or 3 batteries together using tape or strap band. It’s not optimum, it will probably fall apart at the wrong time. On the other hand it costs nothing.

If you want a more secure setup, you’ll have to find a dedicated support. They are available on the web, sometimes with high shipping costs. You can also try DIY. I’ve not tried it myselif but I like the idea!

Eventually, I used a 3D printed holder. Designs exist, by fellows on the web, and they can be ordered or downloaded if you’re the proud owner of a 3D printer. I’ve designed mine myself, and took advantage of another Sculpteo order to save on shipping costs. 6€, more expensive than scotch tape, but more secure.

The result

Tie your wires to the battery holder, place the batteries, snap the connectors in place. Et voilà !

Final setup

If you’re clever enough, no need to solder, to cut or dismantle anything, let alone slash the interiors of a precious camera.

Have fun with your Polaroid type 100 and send me the pictures of your setups and scans of your photographs!